6.2. Managing Domains, Users, and Projects
Acronis Cyber Infrastructure uses the administrative hierarchy of domains and projects with Role-Based Access Control (RBAC) to manage virtual objects of the compute cluster, such as virtual machines, volumes, private networks, and other. A domain is an isolated container of projects and users with assigned roles. Each project and user can only belong to one domain. A project is an isolated container of virtual objects with defined limits for virtual resources, such as vCPU, RAM, storage and floating IP addresses, and assigned users. A role is global and defines all possible tasks the user may perform at the level of the entire cluster, a specific domain, or project:
- within the cluster, you can perform system administration tasks;
- within a domain, you can create and manage projects and user accounts;
- within a project, you can create and manage virtual objects.
Such an implementation provides an administrative environment with own users and virtual objects and ensures their isolation from other users and virtual objects.
6.2.1. Managing Domains
During the primary node deployment, the unique Default domain is created along with the default user account and project. Only within this domain you can create system administrators with access to the admin panel. The default domain cannot be deleted.
To create a new domain, do the following:
On the SETTINGS > Projects and users screen, click Create domain.
In the Create domain window, specify the domain name and, optionally, description.
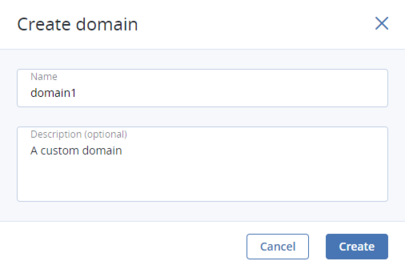
Click Create.
Enabling and disabling a domain means allowing and prohibiting access to it, respectively, in the self-service panel.
To edit, disable/enable, or delete a domain, click the ellipsis button next to it and select the desired action. A domain cannot be deleted if it has projects.
6.2.2. Managing Domain Users
A user can be assigned one of the following roles:
- A system administrator has access to the admin panel and can perform system administration tasks depending on assigned permissions. It is the only role that enables creating projects and defining quotas for them. Additionally, a system administrator with domain permissions can manage virtual objects in all projects within the Default domain as well as project and user assignment in the self-service panel.
- A domain administrator can manage virtual objects in all projects within the assigned domain as well as project and user assignment in the self-service panel. A domain administrator can only be assigned to one domain.
- A project member acts as a project administrator in a specific domain in the self-service panel. A project member can be assigned to different projects and can manage virtual objects in them.
Within the Default domain, the default administrator account is created with the unique Superuser permission. The user name for this account is admin and the password is specified during the primary node deployment. This account cannot be deleted or disabled and its permissions cannot be changed. Other than that, admin does not differ from a user assigned the System administrator role.
To view and edit existing users of a domain or create new ones, click the desired domain and go the DOMAIN USERS tab. Creating a user account differs slightly depending on the user role and is described in sections below.
To edit the user credentials or permissions, click the ellipsis button next to the user and then click Edit. Any system administrator can also change their password by clicking the user icon in the top right corner of the admin panel and then clicking Change password.
Enabling and disabling a user account means allowing and prohibiting user login, respectively.
To enable/disable or remove a user, click the corresponding ellipsis button and select the desired action.
6.2.2.1. Creating System Administrators
Note
System administrators can be created only within the Default domain.
To create a system administrator, do as follows:
- On the SETTINGS > Projects and users screen, click the Default domain.
- Go to the DOMAIN USERS tab and click Create user.
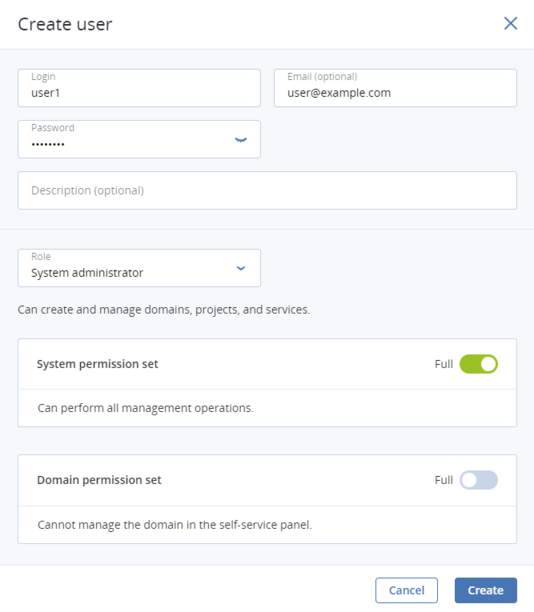
- In the Create user window, specify the user name, password, and, if required, a user e-mail address and description. The user name must be unique within a domain.
- Select the System administrator role from the Role drop-down menu.
- Choose permissions to be granted to the user account from the System permission set section:
- Full (System administrator): has all permissions and can perform all management operations, including projects creation and other users management;
- Compute: can create and manage the compute cluster;
- ISCSI: can create and manage iSCSI targets, LUNs, and CHAP users;
- S3: can create and manage the S3 cluster;
- ABGW: can create and manage Backup Gateway;
- NFS: can create and manage NFS shares and exports;
- Cluster: can create the storage cluster, join nodes to it, and manage (assign and release) disks;
- Network: can modify networks and traffic types;
- Update: can install updates;
- SSH: can add and remove SSH keys for cluster nodes access;
- None (Viewer): can monitor cluster performance and parameters but cannot change any settings.
- Optionally, enable the Domain permissions set to be able to manage virtual objects in all projects within the Default domain and other users in the self-service panel.
- Click Create.
6.2.2.2. Creating Domain Administrators
To create a domain administrator, do as follows:
- On the SETTINGS > Projects and users screen, click a domain for which the administrator will be created.
- Go to the DOMAIN USERS tab and click Create user.
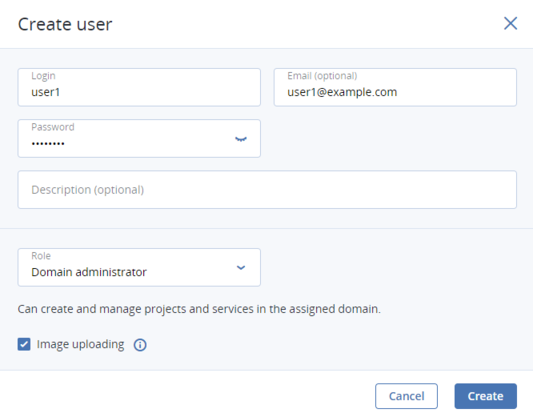
- In the Create user window, specify the user name, password, and, if required, a user e-mail address and description. The user name must be unique within a domain.
- Select the Domain administrator role from the Role drop-down menu.
- Optionally, select the Image uploading checkbox. The state of this permission will be inherited by users created by this domain administrator.
- Click Create.
6.2.2.3. Creating Project Members
To create a project member, do as follows:
- On the SETTINGS > Projects and users screen, click a domain within which the user will be created.
- Go to the DOMAIN USERS tab and click Create user.
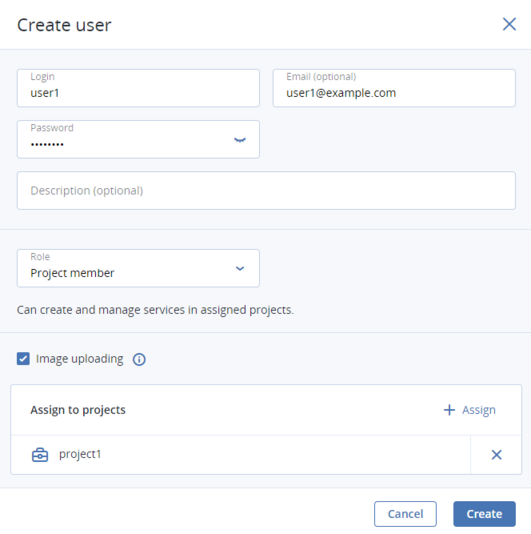
- In the Create user window, specify the user name, password, and, if required, a user e-mail address and description. The user name must be unique within a domain.
- Select the Project member role from the Role drop-down menu.
- Optionally, select the Image uploading checkbox. If this option is disabled, this user will not be able to upload images.
- Optionally, click Assign and choose a project this user will be assigned to.
- Click Create.
6.2.3. Managing Projects
The Default domain has the default admin project, which is a bootstrap project for initializing the compute cloud. It cannot be deleted or renamed.
To create a new project, do the following:
On the SETTINGS > Projects and users screen, click a domain within which the project will be created.
On the PROJECTS tab, click Create project.
In the Create project window, specify the project name and, optionally, description. The project name must be unique within a domain.
Optionally, deselect the Enabled checkbox to disable the created project.
Define quotas for virtual resources that will be available inside the project. To specify a certain value for a resource, deselect the Unlimited checkbox next to it first.
If you have not yet deployed the compute cluster, you are not able to set project’s quotas. Create the compute cluster as described in Creating the Compute Cluster and return to defining project’s quotas as described in Editing Quotas for Projects.
Note
As quotas can exceed the existing virtual resources and virtual resources are not reserved for each project, a system administrator needs to ensure the compute cluster has enough virtual resources for all projects in all domains.
Click Create.

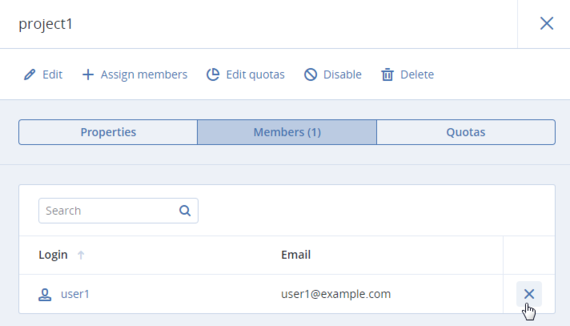
Once the project is created, you can open its panel to view its properties on the Properties tab, list its members on the Members tab, and monitor its resource consumption on the Quotas tab.

Enabling and disabling a project means allowing and prohibiting access to it, respectively, in the self-service panel.
To edit, enable/disable, or delete a project, click the ellipsis button next to it and select the desired action. A project cannot be deleted if it has virtual objects.
6.2.3.1. Assigning Members to Projects
You can manage project members assignment either on the PROJECTS tab or DOMAIN USERS tab.
To assign a user to a project, do one of the following:
Within the domain, open the PROJECTS tab:
- Click the project to which you want to assign users.
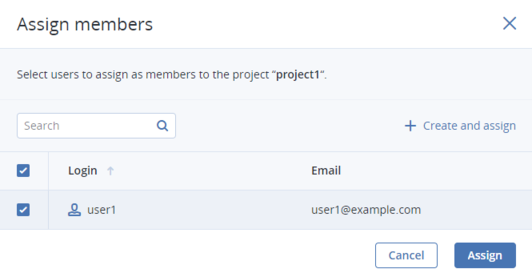
- On the project panel, click Assign members.
- In the Assign members window, choose one or multiple users to assign to the project. Optionally, click Create and assign to create a new project member in a new window. Only user accounts with the Project member role are displayed.
- Click Assign.
Within the domain, open the DOMAIN USERS tab:
- Click the user account with the Project member role whom you want to assign to the project.
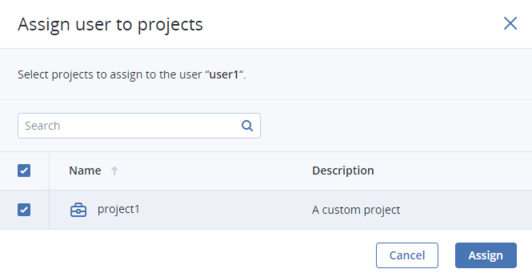
- On the user panel, click Assign to project.
- On the Assign user to projects window, select one or multiple projects and click Assign.
You can monitor user assignment to projects either on the Members tab of the project panel or on the Projects tab on the user panel.
To unassign a user from a project, do one of the following:
Within the domain, open the PROJECTS tab:
- Click the project from which you want to unassign users.
- On the project panel, open the Members tab.
- Click the cross icon next to a user you want to unassign.
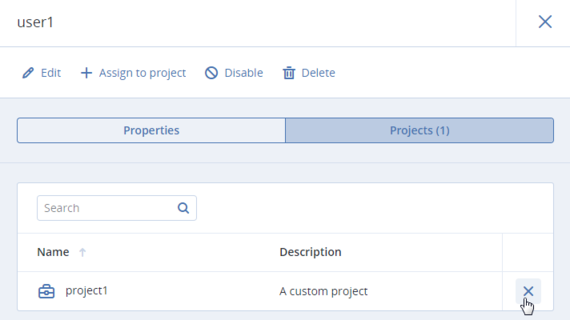
Within the domain, open the DOMAIN USERS tab:
- Click the user whom you want to unassign from the project.
- On the user panel, open the Projects tab.
- Click the cross icon next to the project from which you want to unassign the user.
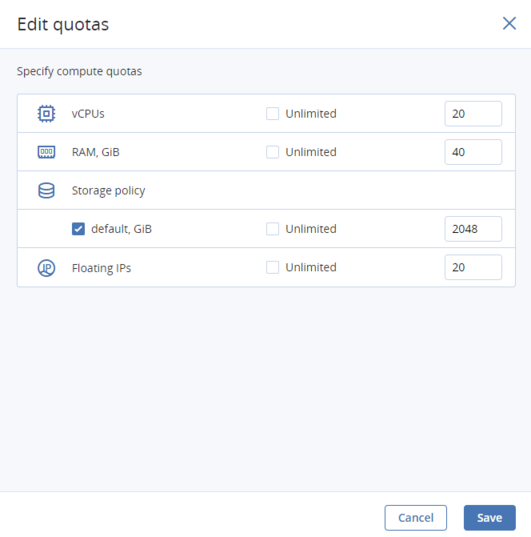
6.2.3.2. Editing Quotas for Projects
To change resource quotas for a project, do the following:
- Click the project for which you want to edit quotas.
- On the project panel, click Edit quotas.
- In the Edit quotas window, specify new values for the desired virtual resources.
- Click Save to apply changes.