4.7. Managing Volumes
A volume in Acronis Cyber Infrastructure is a virtual disk drive that can be attached to a VM. The integrity of data in volumes is protected by a redundancy mode specified in a storage policy.
Note
Additional virtual disks attached to VMs need to be initialized inside the guest OS by standard means before they can be used.
4.7.1. Creating, Editing, and Removing Volumes
To create a volume, do the following:
On the COMPUTE > Storage > VOLUMES tab, click Create volume.
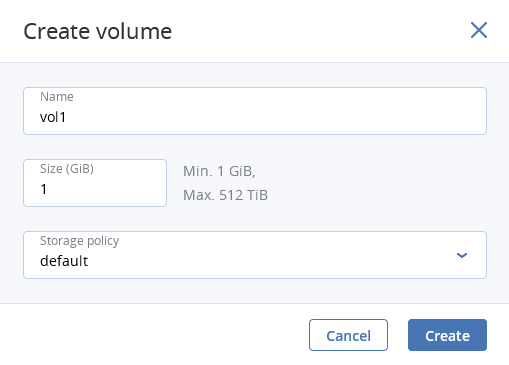
In the Create volume window, specify a volume name and size in gigabytes, select a storage policy, and click Add.
To edit a volume, select it and click the pencil icon next to a parameter you need to change. Note the following restrictions:
- You cannot shrink volumes.
- To extend volumes that are in use, stop the VM first.
- You cannot change the volume redundancy type.
To remove a volume, click its ellipsis button then click Delete. To remove multiple volumes at once, select them and click Delete. To remove a volume that is in use, detach it first.
Note
A volume is removed along with all its snapshots.
4.7.2. Cloning Volumes
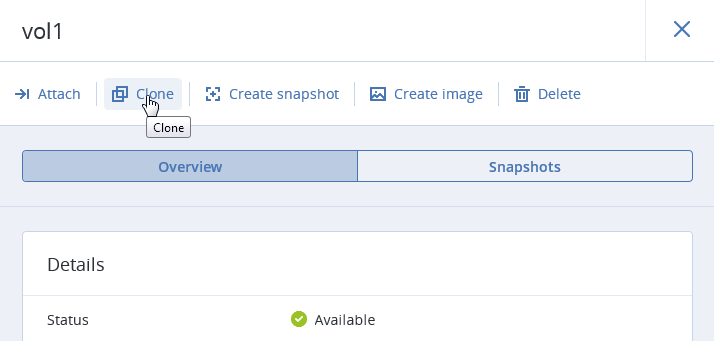
You can clone volumes that are not attached to VMs or attached to stopped VMs. To clone a volume, do the following:
On the COMPUTE > Storage > VOLUMES tab, click a volume.
In volume details that opens, click Clone.
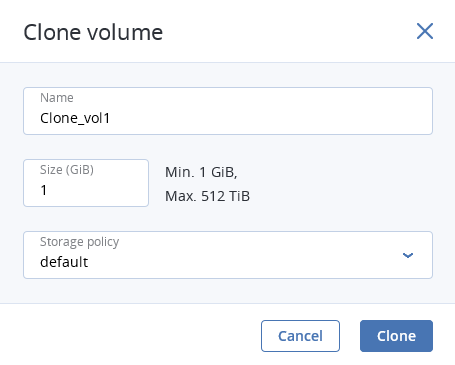
In the Clone volume window that opens, specify a volume name, size, and storage policy. Click Clone.
4.7.3. Attaching and Detaching Volumes
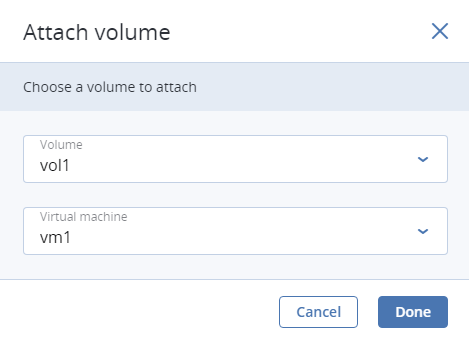
To add a writable virtual disk drive to a VM, attach a volume to it. To do this:
On the COMPUTE > Storage > VOLUMES tab, click the ellipsis button next to an unused volume and click Attach in the context menu.
In the Attach volume window, select the VM from the drop-down list and click Done.
To detach a volume, do the following:
- Click the ellipsis button next to the volume that is in use.
- If the VM is not running, click Detach. If the VM is running, you can only click Force detach to immediately detach the volume with a risk of data loss.
4.7.4. Creating Images from Volumes
To create multiple VMs with the same boot volume, you can create an image from an existing boot volume and deploy VMs from it. Make sure to install cloud-init in the volume before creating the image.
Do the following:
Power off the VM that the original volume is attached to.
Switch to the COMPUTE > Storage > VOLUMES tab, click volume’s ellipsis button and choose Create image.
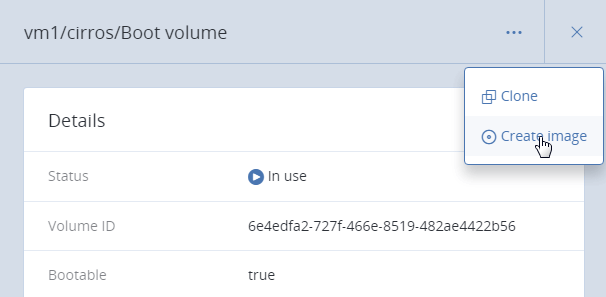
In the Create image window, enter an image name and click Create.
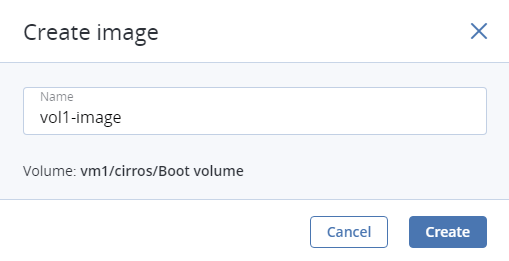
The new image will appear on the IMAGES tab.
4.7.5. Managing Volume Snapshots
You can save the current state of a VM file system or user data by creating a snapshot of a volume. A snapshot of a boot volume may be useful, for example, before updating VM software. If anything goes wrong, you will be able to revert the VM to a working state at any time. A snapshot of a data volume can be used for backing up user data and testing purposes.
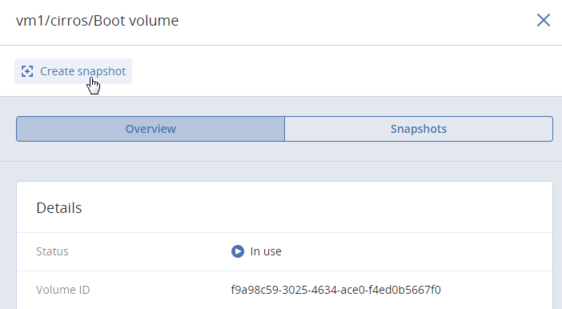
To create a snapshot of a volume, do the following:
On the COMPUTE > Storage > VOLUMES tab, click a volume.
In the volume panel that opens, switch to Snapshots and click Create snapshot.
Note
To create a consistent snapshot of a running VM’s volume, make sure the guest tools are installed in the VM. QEMU guest agent included in the guest tools image automatically quiesces the filesystem during snapshotting. For the instructions on installing the guest tools, see the section “Installing Guest Tools” in the Administrator’s Command Line Guide.
Once the snapshot is created, you can see and manage it on the Snapshots tab on the volume panel.
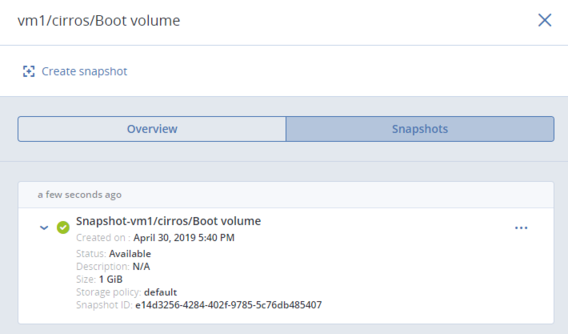
To see the full list of available actions, click the ellipsis button next to a snapshot. Actions include:
Create volume creates a new volume from the snapshot.
Create image creates a template image from the snapshot.
Revert to snapshot discards all changes that have been made to the volume since the snapshot was taken. This action is available only for VMs with the “Shut down” and “Shelved offloaded” statuses.
Warning
As each volume has only one snapshot branch, all snapshots created after the snapshot you are reverting to will be deleted. If you want to save a subsequent snapshot before reverting, create a volume or an image from it first.
Edit changes the snapshot name and description.
Reset resets the snapshot stuck in the “Error” state or one of transitional states to the “Available” state.
Delete removes the snapshot.