3.2. Managing networks and traffic types
To balance and optimize networking in Acronis Cyber Infrastructure, you can assign different types of traffic to separate networks. Assigning a traffic type to a network means that a firewall is configured on nodes connected to this network, specific ports are opened on node network interfaces, and the necessary iptables rules are set. For example, nodes connected to a network with only the S3 public traffic type will accept incoming connections only on ports 80 and 443.
3.2.1. Networks overview
By default, you have two preconfigured networks named Public and Private, according to their type. They can be considered templates, which you can customize to create the desired (recommended) configuration.
As described in the Planning the network, Acronis Cyber Infrastructure can have several recommended network configurations depending on the deployed services:
For the Backup Gateway, the recommended network configuration includes two networks, for internal and external traffic. You can leave the default Public and Private networks as they are. In this case, traffic types should be assigned to these networks, according to the following table:
Table 3.2.1.1 Recommended network setup for Backup Gateway¶ Network Traffic types Private Storage, Internal management, OSTOR private, ABGW private Public Admin panel, SSH, S3 public, iSCSI, NFS, ABGW public For the compute service deployed for evaluation purposes, the minimum network configuration includes two networks, for internal and external traffic. You can leave the default Public and Private networks as they are. In this case, traffic types should be assigned to these networks, according to the following table:
Table 3.2.1.2 Minimum network setup for compute¶ Network Traffic types Private Storage, Internal management, OSTOR private, ABGW private, VM private, VM backups, VM public Public Admin panel, SNMP, SSH, Self-service panel, Compute API, VM public, iSCSI, NFS, S3 public, ABGW public For the compute service deployed for production, the recommended network configuration implies creating additional networks. The following networks are required:
- Private network, assigned to the first bonded connection
- Overlay network, assigned to a VLAN created on the second bonded connection
- Public network, assigned to a VLAN created on the second bonded connection
- External VM network, assigned to a VLAN created on the second bonded connection
- Backup network, assigned to a VLAN created on the second bonded connection
The required traffic types should be distributed between these networks, according to the following table:
Table 3.2.1.3 Recommended network setup for compute¶ Network Traffic types Private Storage, Internal management, OSTOR private, ABGW private Overlay VM private Public Admin panel, SSH, SNMP, Compute API, Self-service panel, S3 public, iSCSI, NFS, ABGW public External VM VM public Backup VM backups, VM public
Note
If you plan to use RDMA over InfiniBand, move the traffic type Storage to a dedicated network and assign that network to the IB interface. Refer to Enabling RDMA.
To create the recommended network configuration, do the following:
- Add new networks, if required (refer to Creating networks).
- Configure the required traffic types according to your network setup (refer to Traffic types overview).
- Connect the network interfaces to the new networks (refer to Assigning networks to network interfaces).
3.2.2. Creating networks
If required, you can add a new network as follows:
On the Infrastructure > Networks screen, click Create network.
In the New network window, specify a network name. Network names may contain only Latin letters, numbers, and underscores, and must be 3 to 32 characters long.
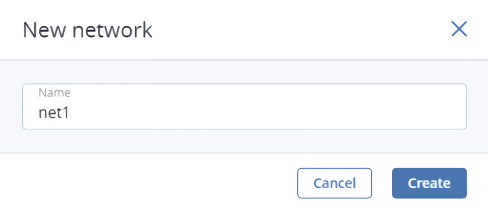
Click Create.
3.2.3. Viewing network details
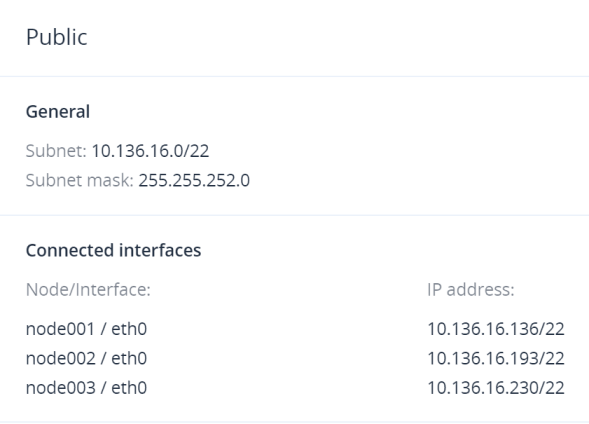
To view network details, click the cogwheel icon next to the network name. In the network summary window, the following information is available:
- The General section includes the network CIDR and subnet mask.
- The Connected interfaces section shows the nodes’ network interfaces with their IP addresses.
3.2.4. Renaming networks
To rename a network, do the following:
On the Infrastructure > Networks screen, click the cogwheel icon next to the network name.
In the network summary window, click Edit.
Note
A public network cannot be renamed if it is used by a compute virtual network.
In the Rename window, enter a new name and click Save.
3.2.5. Migrating networks
You can modify your network configuration and IP address assignment to cluster nodes by using network migration.
Before network migration, take note of the following:
- All the connected node interfaces must be online.
- Every network interface must have only one IP address.
- High availability must be disabled before the operation, and can be enabled afterwards, if required.
- If a network is the default gateway network, all nodes connected to it must use the same default gateway.
- DHCP can be enabled for the source network but must be disabled for the target network. After migration, IP addresses obtained via DHCP will become static.
To migrate a network from the source configuration to the target one, do the following:
On the Infrastructure > Networks screen, click the cogwheel icon next to the network name.
In the network summary window, click Migrate.
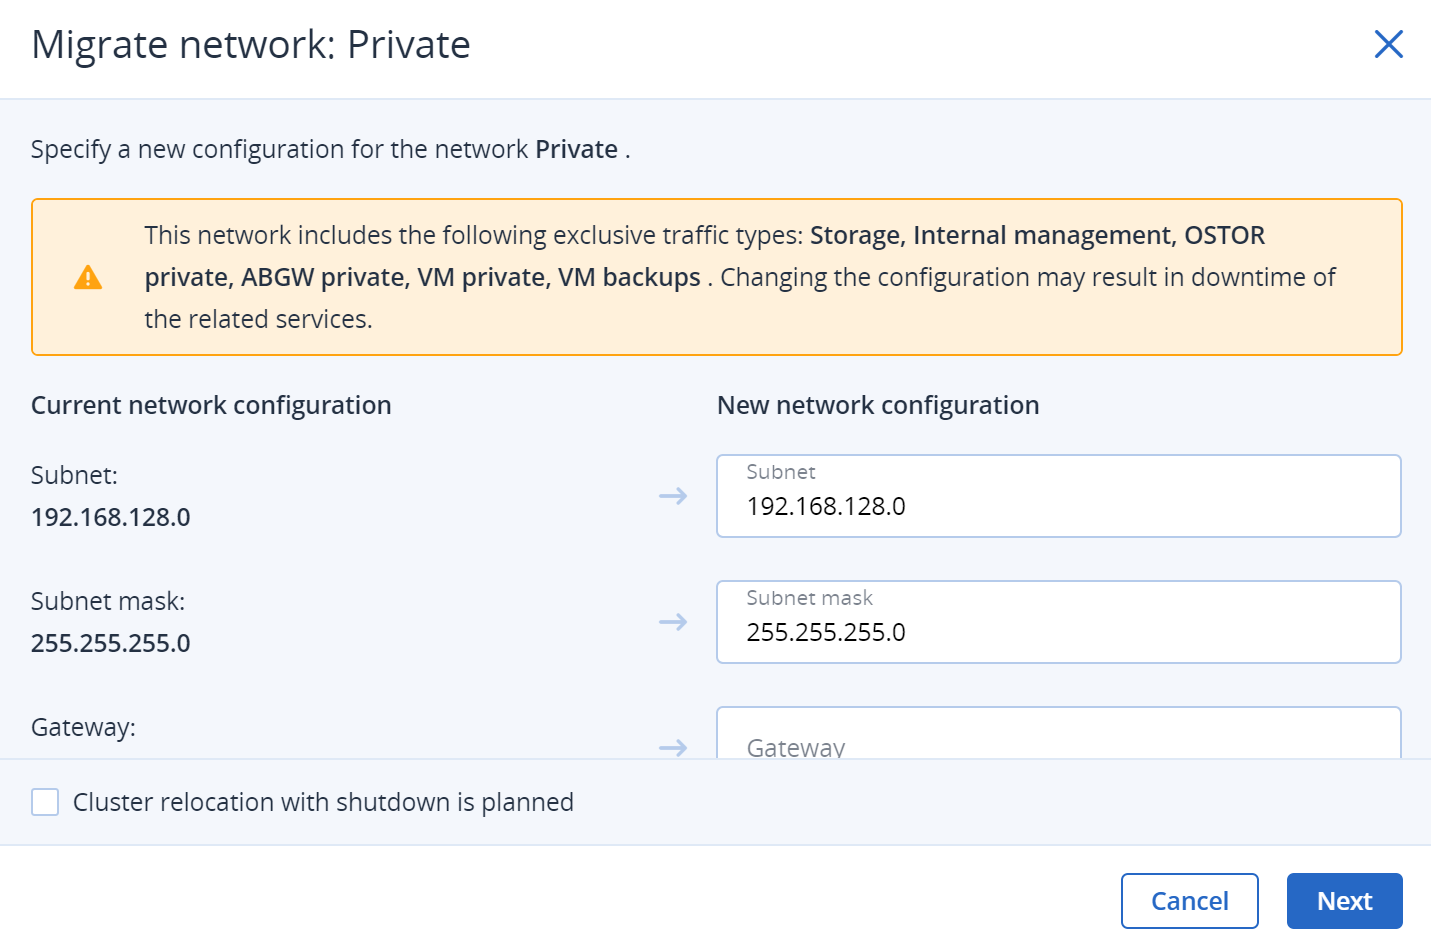
In the Migrate network: <network name> window, review the current network configuration, and important information about potential risks, and edit the new network configuration, if required.
If you plan to move your cluster to another location, which implies cluster manual shutdown, select Cluster relocation with shutdown is planned.
Then, click Next.
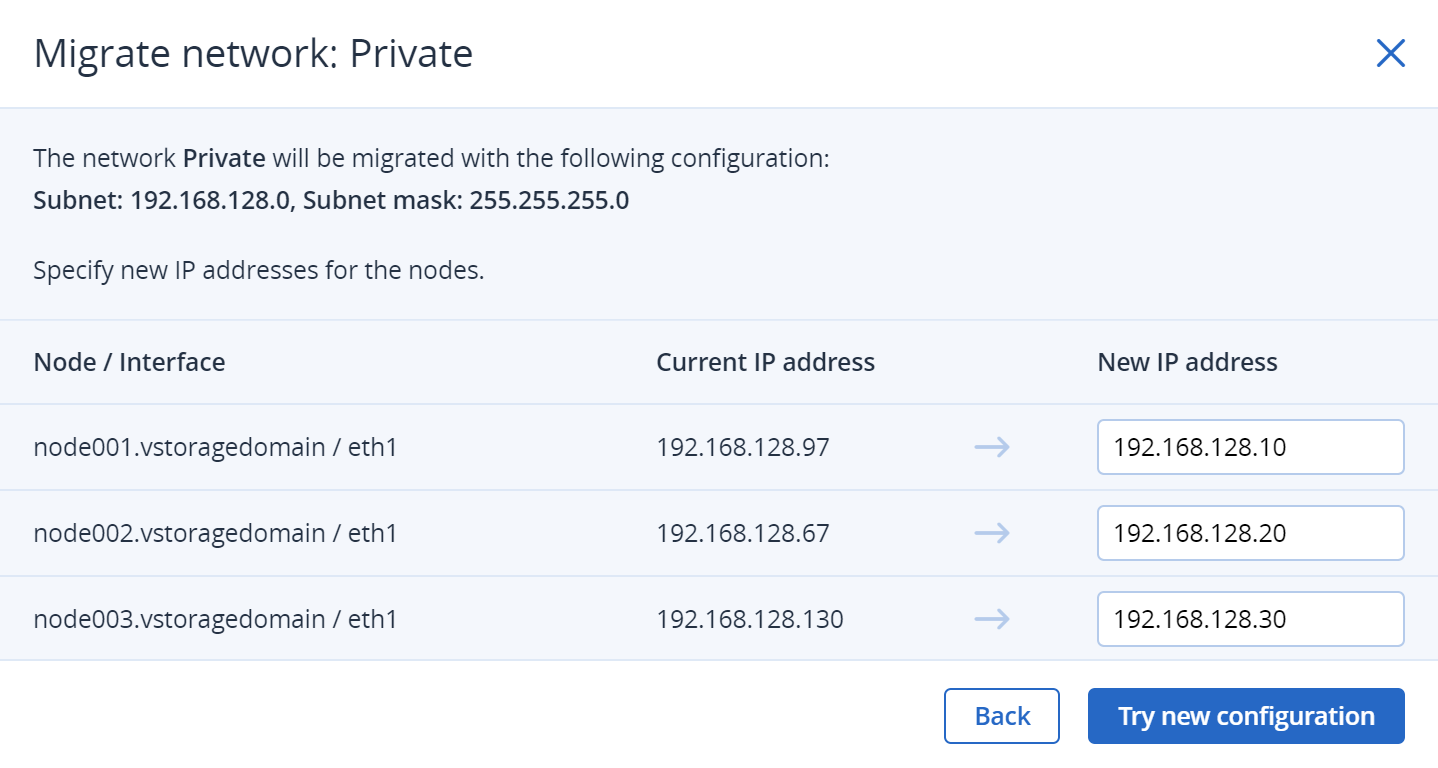
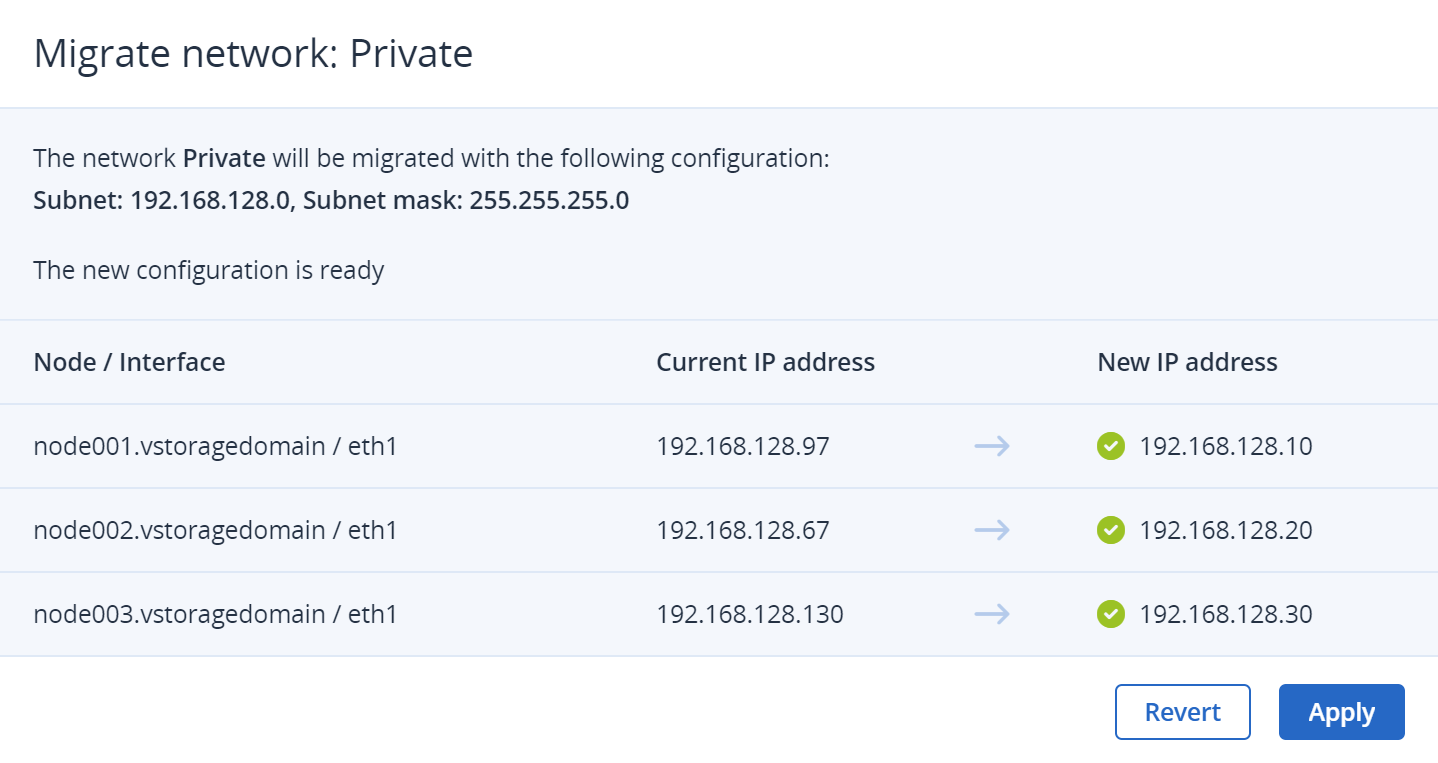
On the next step, specify new IP addresses for cluster nodes, and click Try new configuration. Then, confirm your action by clicking Continue in the Try new configuration window.
If you plan cluster relocation, you can shut down your cluster nodes and then turn them on in a new datacenter, as described in Shutting down and starting up the storage cluster. After cluster relocation, click Resume.
Wait until the new configuration is created and then click Apply.
Important
While network migration is in progress, users cannot perform other tasks in the admin panel. Moreover, the self-service users may not have access to the portal and will need to wait until the migration is complete.
If the connectivity checks fail, you need to fix the found issues and try again. If the specified new IP addresses are not available or valid, you can change them in the wizard and click Retry. With other network issues, revert to your old network configuration by clicking Revert, fix the issue, and try again.
Wait until the migration is complete on all the connected interfaces, and then click Done.
Important
After you migrate a network with the Internal management traffic type, manually restart all running virtual machines, to be able to access them via VNC console.
In case the migration fails, you will need to do the following:
- Connect to your cluster via SSH.
- Investigate
/var/log/vstorage-ui-backend/celery.logto find the root cause. - Fix the issue.
- Go back to the wizard screen and click Retry.
3.2.6. Deleting networks
Note
You can only delete networks that are not assigned to any network adapters.
To delete a network, do the following:
- On the Infrastructure > Networks screen, click the cogwheel icon next to the network name.
- In the network summary window, click Delete.
- In the Delete network window, confirm your action by clicking Delete.
3.2.7. Traffic types overview
The next three subsections describe all of the traffic types that can be assigned to networks.
3.2.7.1. Exclusive traffic types
Exclusivity means that such a traffic type can be added only to one network. Such traffic types cannot be removed from any network and can only be reassigned to another network (refer to Managing exclusive traffic types).
Important
Exclusive traffic types cannot be edited or removed.
- Internal management
- Internal cluster management and transfers of node monitoring data to the admin panel. Without this traffic type, the administrator cannot control and monitor the cluster. The cluster, however, continues working. Uses any available port.
- Storage
- Internal transfers of data chunks, high availability service heartbeats, as well as data self-healing. This is the most critical traffic type that defines storage performance and enables cluster high availability. Uses any available port.
- OSTOR private
- Internal data exchange between multiple S3/NFS services. Uses any available port.
- ABGW private
- Internal management of and data exchange between multiple Backup Gateway services. Uses any available port.
- VM private
- Network traffic between VMs in private virtual networks and VNC console traffic. Virtual networks are implemented as VXLAN, overlay networking fully isolated on L2. Opens UDP port 4789 and TCP ports from 5900 to 5999.
- Compute API
External access to standard OpenStack API endpoints. Opens the following ports:
- TCP 5000—Identity API v3
- TCP 6080—noVNC Websocket Proxy
- TCP 8004—Orchestration Service API v1
- TCP 8041—Gnocchi API (billing metering service)
- TCP 8774—Compute API
- TCP 8776—Block Storage API v3
- TCP 8780—Placement API
- TCP 9292—Image Service API v2
- TCP 9313—Key Manager API v1
- TCP 9513—Container Infrastructure Management API (Kubernetes service)
- TCP 9696—Networking API v2
- TCP 9888—Octavia API v2 (load balancer service)
- VM backups
- External access to NBD endpoints. Third-party backup management systems can pull VM backups by using this traffic type. To be able to access backup agents installed in virtual machines, assign this traffic type along with VM public. Opens TCP ports from 49300 to 65535.
3.2.7.2. Regular traffic types
The following traffic types are not exclusive. These traffic types can be added to multiple networks or removed from any network (refer to Managing regular traffic types).
Important
Regular traffic types cannot be edited or removed.
- S3 public
- External data exchange with the S3 access point. Uses TCP ports 80 and 443.
- iSCSI
- External data exchange with the iSCSI access point. Uses TCP port 3260.
- NFS
- External data exchange with the NFS access point. Uses TCP/UDP ports 111, 892, and 2049.
- ABGW public
- External data exchange with Acronis Backup agents and Acronis Backup Cloud. Uses TCP port 44445.
- Admin panel
- External access to the admin panel. Uses TCP port 8888.
- VM public
- External data exchange between VMs and public networks (for example, the Internet). When you assign a network with this traffic type to a node network interface and then create a compute physical network over this infrastructure network, an Open vSwitch bridge is created on that network interface.
- SSH
- Remote access to nodes via SSH. Uses TCP port 22.
- SNMP
- External access to storage cluster monitoring statistics via the SNMP protocol. Opens UDP port 161.
- Self-service panel
- External access to the self-service panel. Opens TCP port 8800.
3.2.7.3. Custom traffic types
You can create custom traffic types that will open desired TCP ports. Such traffic types can be added to multiple networks, edited, and deleted (refer to Managing custom traffic types).
3.2.8. Managing exclusive traffic types
Exclusive traffic types can only be reassigned from one network to another and only one at a time. Reassignment can be performed even if the related services are already deployed. This can be useful, for example, if the initial network configuration is wrong but the storage cluster is already populated with data and running critical services; or after adding a network card, which requires changing network settings, adding a new network, and assigning traffic types to it.
Before reassigning exclusive traffic types, make sure the following requirements are met:
- All the connected node interfaces must be online.
- Every network interface must have only one IP address.
- The number of interfaces on nodes connected to the source and target networks is the same. Unassigned nodes are also taken into account.
- The deployed related services are in the healthy state.
The following exclusive traffic types have limitations for reassignment:
The Storage traffic type cannot be reassigned from a network connected to InfiniBand devices.
The Internal management traffic type cannot be reassigned if high availability is enabled.
The Compute API traffic type cannot be reassigned if high availability is enabled.
With enabled high availability, you can assign the Compute API traffic type only if it has no assignment and only to a network with a virtual IP address, that is, a network with either the Admin panel or Internal management traffic type.
To reassign an exclusive traffic type, do the following:
On the Infrastructure > Networks screen, click the pencil icon next to the traffic type you want to reassign.
Reassign the traffic type to another network by selecting the corresponding radio button, and then click the check mark.
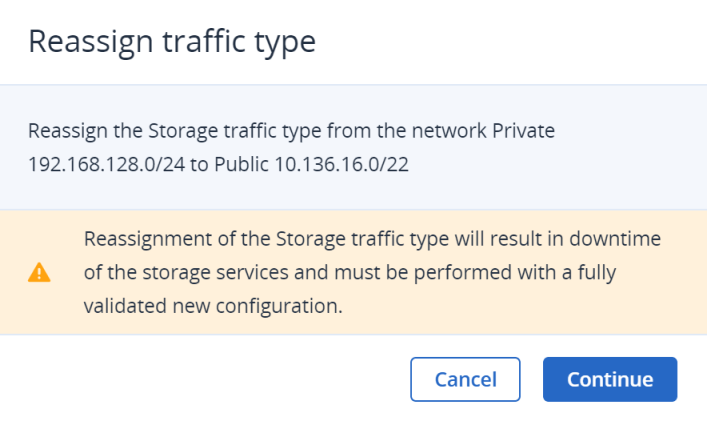
If the related services are already deployed, the Reassign traffic type wizard will open. In the wizard, review the source and target networks, and important information about potential risks, and then click Continue to start the traffic type reassignment.
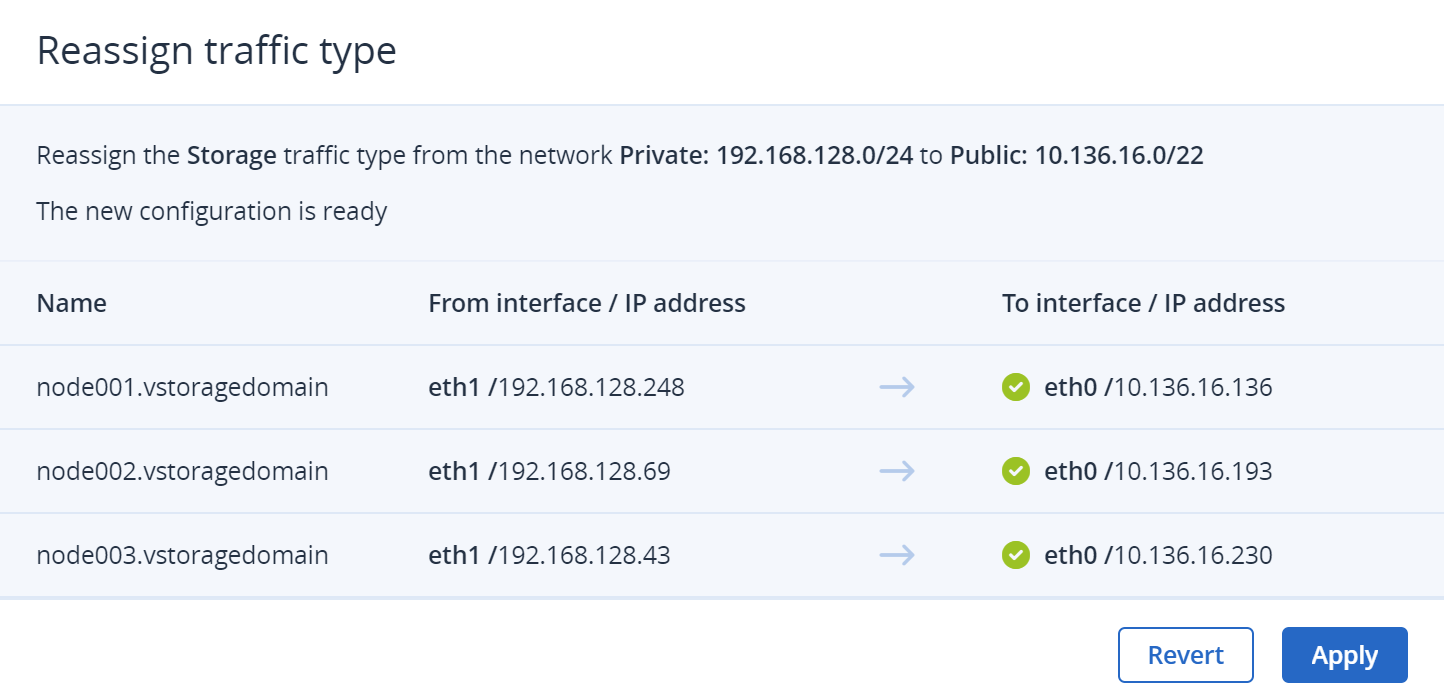
Wait until the connected interfaces are tested and the new configuration is created. Then, click Apply.
Important
While traffic type reassignment is in progress, users cannot perform other tasks in the admin panel. Moreover, the self-service users may not have access to the portal and will need to wait until the reassignment is complete.
If the connectivity checks fail, you can revert to your old network configuration by clicking Revert. Then, you need to fix the found issues and try again.
Wait until the reassignment is complete on all the connected interfaces, and then click Done.
Important
After you reassign the Internal management traffic type, manually restart all running virtual machines, to be able to access them via VNC console.
In case the reassignment fails, you will need to do the following:
- Connect to your cluster via SSH.
- Investigate
/var/log/vstorage-ui-backend/celery.logto find the root cause. - Fix the issue.
- Go back to the wizard screen and click Retry.
3.2.9. Managing regular traffic types
Regular traffic types can be assigned to one or more networks, reassigned to other networks, or unassigned from any network.
Note the following limitations:
- You cannot unassign regular traffic types from networks if they are used by services. For example, you cannot unassign the VM public traffic type from an infrastructure network with a compute network created over it. Additionally, at least one network with the Admin panel traffic type must exist in the cluster to enable access to the admin panel.
- The Admin panel traffic type cannot be reassigned if high availability is enabled.
You can do any of the available actions as follows:
- On the Infrastructure > Networks screen, click the pencil icon next to the Regular traffic types section.
- Add or remove the needed traffic type from your networks by selecting the corresponding check boxes.
- Click the check mark to apply the changes.
3.2.10. Managing custom traffic types
With a custom traffic type, you can do the following:
- Create a custom traffic type
- Assign it to one or more networks, reassign it to other networks, or unassign it from any network
- Edit its name and port
- Delete a custom traffic type
3.2.10.1. Creating custom traffic types
If required, you can add a new traffic type as follows:
On the Infrastructure > Networks screen, click Create traffic type.
In the Create traffic type window, specify a traffic type name and port to open. Traffic type names must be alphanumeric and 3 to 32 characters long.
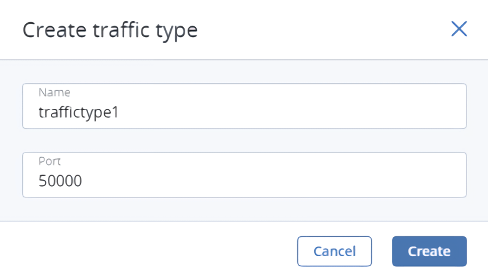
Click Create.
3.2.10.2. Assigning, reassigning, and unassigning custom traffic types
To assign, reassign, or unassign a custom traffic type, do the following:
- On the Infrastructure > Networks screen, click the pencil icon next to the Custom traffic types section.
- Add the needed traffic type to or remove it from your networks by selecting the corresponding check boxes.
- Click the check mark to apply the changes.
3.2.10.3. Editing custom traffic types
To edit a custom traffic type, do the following:
- Make sure it is excluded from all networks.
- On the Infrastructure > Networks screen, click the ellipsis icon next to the traffic type, and select Edit.
- In the Edit traffic type window, change the traffic type name or port and click Save.
3.2.10.4. Deleting custom traffic types
To delete a custom traffic type, do the following:
- Make sure it is excluded from all networks.
- On the Infrastructure > Networks screen, click the ellipsis icon next to the traffic type, and then select Delete.
- In the Delete traffic type window, confirm your action by clicking Delete.