3.6. Connecting remote iSCSI devices to storage cluster nodes
Acronis Cyber Infrastructure allows you to connect remote iSCSI devices to nodes and perceives their LUNs as storage disks. You can connect iSCSI devices to nodes at any time.
Note the following:
- iSCSI targets can only be used for storage if they have synchronous writes enabled.
- Remote iSCSI devices cannot be attached to hosts that belong to iSCSI target groups.
- Only one IQN can be used per node. You can connect multiple iSCSI targets using other cluster nodes.
To connect a remote iSCSI device to a node, do the following:
On the Infrastructure > Nodes screen, click the required node name. On the Disks tab, click iSCSI target.
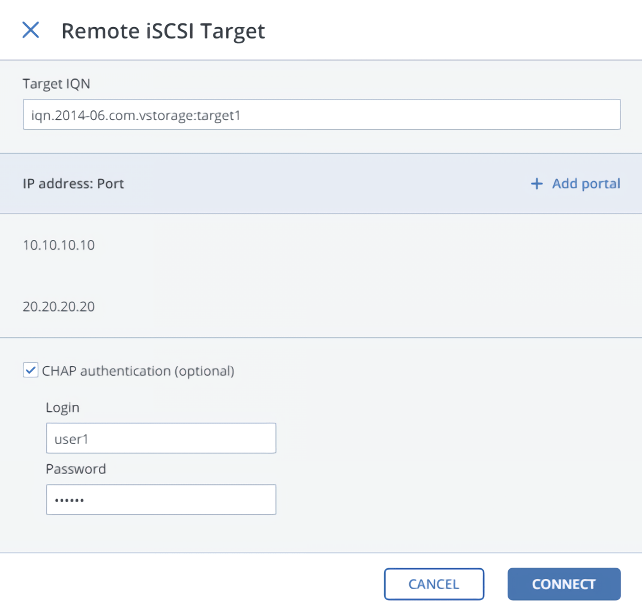
In the Remote iSCSI Target window, do the following:
- Specify the IQN of the target.
- In the Portal and Port fields, specify the target’s IP address and port (optional), and then click the check mark.
- If the target has multiple paths, click Add portal and configure it as in the previous step.
- (Optional) To enable CHAP authentication for the target, select CHAP authentication and specify the credentials.
- Click Connect.
The target will be connected and all of its LUNs will be initiated. Devices of the iSCSI type will appear in the node’s DISKS list.
Note
If you add another LUN to a connected target, rescan it by running iscsiadm -m node -R in the host’s console.
To remove an iSCSI target, click iSCSI Target, Delete connection, and then click Delete.
3.6.1. Assigning disk roles to remote iSCSI devices
If the node had already been in the cluster before you connected the iSCSI device to it, assign disk roles to all of its LUNs. To do this:
- Select a disk with the iSCSI type, and then click Assign.
- In the Choose role window, select Storage, and then click Done.
- Repeat the above steps for every disk with the iSCSI type.
Even though you can assign Metadata or Cache roles to such disks, it is recommended only for single-node installations for Backup Gateway with SAN-provided redundancy. For more information on disk roles, refer to Assigning disk roles manually.