3.7. Replacing node disks
Before replacing a disk, you need to release it from the storage cluster first. During a disk release, its data is safely migrated to other disks, which takes time. To avoid data loss, wait until data migration is complete.
Important
A graceful release of a storage disk is possible only if the remaining disks in the storage cluster can comply with the configured redundancy scheme. You can, however, release a disk forcibly without data migration, but it will make the cluster degraded and trigger the cluster self-healing.
To release a disk, do the following:
- On the Infrastructure > Nodes screen, click the name of the node to configure.
- On the Disks tab, select the disk to replace, and then click Release.
- (Optional, highly not recommended) To release the disk without data migration, select Release without data migration.
- Click Yes. The released disk will be displayed as Unassigned on the Disks tab.
When the data migration from the disk completes, the disk is released and can be replaced with a new one. After the replacement, you will need to assign the role of the released disk to the new one:
- The Storage role can be assigned automatically (refer to Configuring new storage disks automatically).
- All other roles need to be assigned by hand (refer to Configuring new disks manually).
3.7.1. Configuring new storage disks automatically
To have the Storage role assigned to replacement storage disks automatically, do the following:
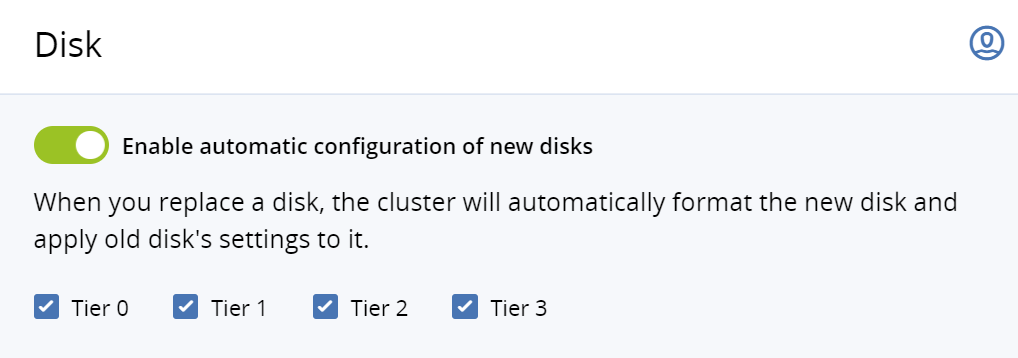
Go to Settings > System settings > Disk.
Turn on the toggle switch Enable automatic configuration of new disks.
(Optional) Clear the tiers that you do not want to be scanned for failed disks. If a disk on an unselected tier breaks down, you will have to assign roles to its replacement manually.
Click Save.
From now on, when you replace a failed Storage disk, the new disk will be detected, formatted, assigned the same role, and placed on the same tier (if applicable). You will see the result on the node’s Disks screen.
Take note of the following:
- If the new disk is larger than the old one, it will be assigned the Storage role.
- If the new disk is smaller than the old one, it will not be assigned the Storage role. Instead, you will be alerted about the size difference and will have to assign the role manually (or change the disk to a larger one).
- If the new disk is of a different type than the old one (for example, if you replaced an SSD with an HDD or vice versa), it will not be assigned the Storage role. Instead, you will be alerted about the type difference and will have to assign the role manually (or change the disk to one of the needed types).
- If you enable this feature after a disk fails, its replacement will not be assigned the Storage role.
- If you accidentally remove and then re-attach a healthy Storage disk, its data will be reused.
- If you add a disk that does not replace any failed ones, it will not be assigned the Storage role.
- If you add a disk and one of the CSes is inactive or offline, the disk will be assigned the Storage role and a new CS will be created.
- If you attach multiple replacement disks at once, the Storage role will be assigned to them in no particular order, as long as their size and type fit. They will also be assigned to correct tiers, if applicable.
3.7.2. Configuring new disks manually
To manually assign roles to a new disk, do the following:
On the Infrastructure > Nodes screen, click the name of the node to configure.
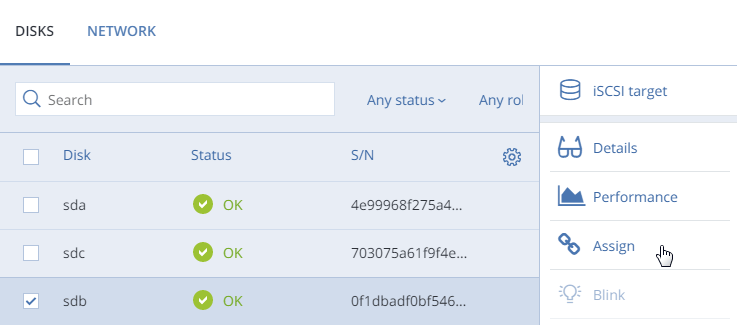
Go to the Disks tab.
Select the unassigned disk, and then click Assign.
On the Choose role screen, select a disk role:
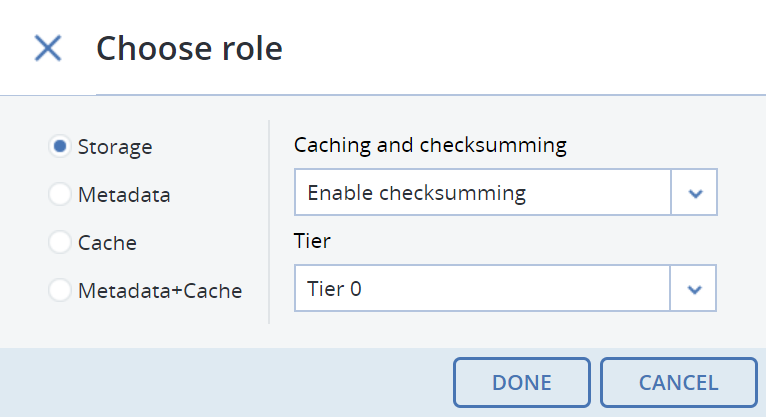
Storage. Use the disk to store chunks and run a chunk service on the node. From the Caching and checksumming drop-down list, select one of the following:
- Use SSD for caching and checksumming. Available and recommended only for nodes with SSDs.
- Enable checksumming (default). Recommended for cold data, as it provides better reliability.
- Disable checksumming. Recommended for hot data, as it provides better performance.
Data caching improves cluster performance by placing frequently accessed data on an SSD.
Data checksumming generates checksums each time some data in the cluster is modified. When this data is then read, a new checksum is computed and compared with the old checksum. If the two are not identical, a read operation is performed again, thus providing better data reliability and integrity.
If a node has an SSD, it will be automatically configured to keep checksums when you add a node to a cluster. This is the recommended setup. However, if a node does not have an SSD drive, checksums will be stored on a rotational disk by default. It means that this disk will have to handle double the I/O, because for each data read/write operation there will be a corresponding checksum read/write operation. For this reason, you may want to disable checksumming on nodes without SSDs to gain performance at the expense of checksums. This can be especially useful for hot data storage.
To add an SSD to a node that is already in the cluster (or replace a broken SSD), you will need to release the node from the cluster, attach the SSD, choose to join the node to the cluster again, and, while doing so, select Use SSD for caching and checksumming for each disk with the role Storage.
With the Storage role, you can also select a tier from the Tier drop-down list. To make better use of data redundancy, do not assign all of the disks on a node to the same tier. Instead, make sure that each tier is evenly distributed across the cluster with only one disk per node assigned to it. For more information, refer to Understanding storage tiers.
Note
If the disk contains old data that was not placed there by Acronis Cyber Infrastructure, the disk will not be considered suitable for use in Acronis Cyber Infrastructure.
Metadata. Use the disk to store metadata and run a metadata service on the node. It is recommended to have only one metadata service per node.
Cache. Use the disk to store the write cache. This role is only for SSDs. To cache a specific storage tier, select it from the drop-down list. Otherwise, all tiers will be cached.
Metadata+Cache. A combination of the two roles described above.
Unassigned. Remove the roles from the disk.
Click Done.
The disk will be assigned the chosen role and added to the cluster.