5.4. Managing virtual machines
Each virtual machine (VM) is an independent system with an independent set of virtual hardware. Its main features are the following:
- A virtual machine resembles and works like a regular computer. It has its own virtual hardware. Software applications can run in virtual machines without any modifications or adjustment.
- Virtual machine configuration can be changed easily, for example, by adding new virtual disks or memory.
- Although virtual machines share physical hardware resources, they are fully isolated from each other (file system, processes, sysctl variables) and the compute node.
- A virtual machine can run any supported guest operating system.
The following table lists the current virtual machine configuration limits:
| Resource | Limit |
|---|---|
| RAM | 1 TiB |
| CPU | 48 virtual CPUs |
| Storage | 15 volumes, 512 TiB each |
| Network | 15 NICs |
5.4.1. Supported guest operating systems
The following guest operating systems have been tested and are supported in virtual machines:
| Operating System | Edition | Architecture |
|---|---|---|
| Windows Server 2019 | Essentials, Standard, Datacenter | x64 |
| Windows Server 2016 | Essentials, Standard, Datacenter | x64 |
| Windows Server 2012 R2 | Essentials, Standard, Datacenter | x64 |
| Windows Server 2012 | Standard, Datacenter | x64 |
| Windows Server 2008 R2 | Standard, Datacenter | x64 |
| Windows Server 2008 | Standard, Datacenter | x64 |
| Windows 10 | Home, Professional, Enterprise, Enterprise 2016 LTSB | x64 |
| Windows 8.1 | Home, Professional, Enterprise | x64 |
| Windows 7 | Home, Professional, Enterprise | x64 |
| Operating System | Architecture |
|---|---|
| CentOS 8.x | x64 |
| CentOS 7.x | x64 |
| CentOS 6.x | x64 |
| RHEL 8.x | x64 |
| RHEL 7.x | x64 |
| Debian 10.x | x64 |
| Debian 9.x | x64 |
| Ubuntu 20.04.x | x64 |
| Ubuntu 18.04.x | x64 |
| Ubuntu 16.04.x | x64 |
5.4.2. Creating virtual machines
Before you proceed to creating VMs, check that you have these:
A guest OS source (refer to Managing images):
A distribution ISO image of a guest OS to install in the VM
A template that is a boot volume in the QCOW2 format
A boot volume
Note
To obtain a boot volume, create a volume, as described in Managing compute volumes, attach it to a VM, install an operating system in it, and then delete the VM.
A storage policy for volumes (refer to Managing storage policies)
A flavor (refer to Managing flavors)
One or more compute networks (refer to Managing the compute network)
An SSH key (refer to Managing SSH keys)
Note
You can specify an SSH key only when creating VMs from a template or boot volume.
Note
Virtual machines are created with the host CPU model, by default. Having compute nodes with different CPUs may lead to live migration issues. To avoid them, you can manually set the CPU model for all new VMs, as described in Setting virtual machine CPU model.
To create a VM, do the following:
On the Compute > Virtual machines > Virtual machines tab, click Create virtual machine. A window will open where you will need to specify the VM parameters.
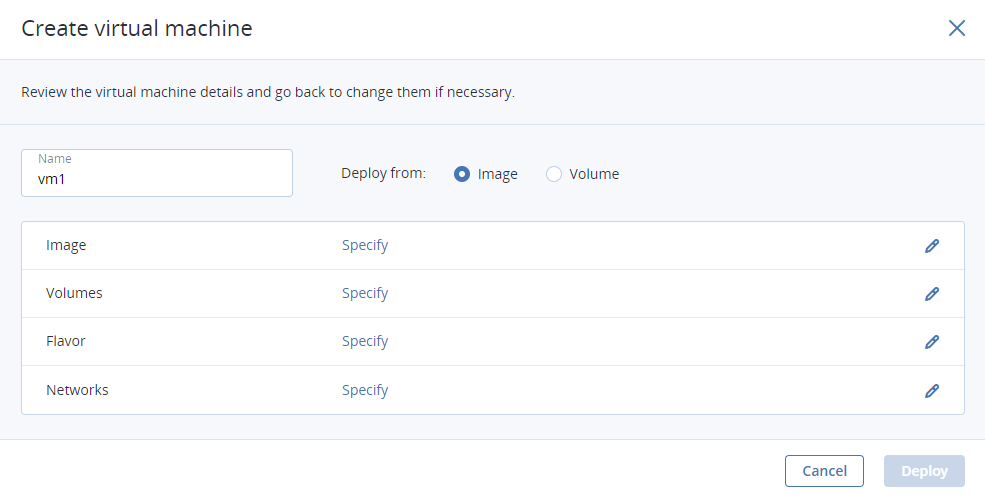
Specify a name for the new VM.
Select the VM boot media:
If you have an ISO image or a template, do the following:
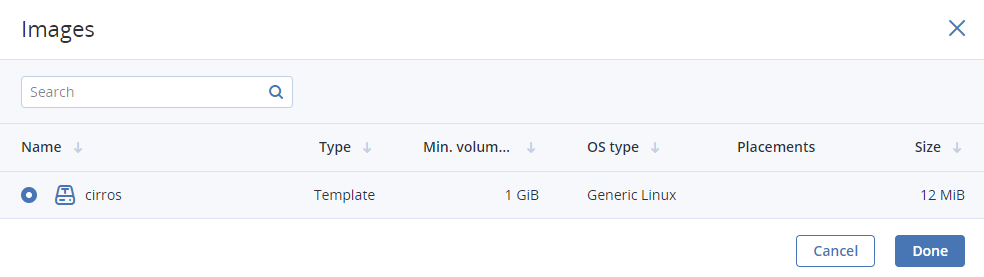
Select Image in the Deploy from section, and then click Specify in the Image section.
In the Images window, select the ISO image or template, and then click Done.
If you have a compute boot volume, do the following:
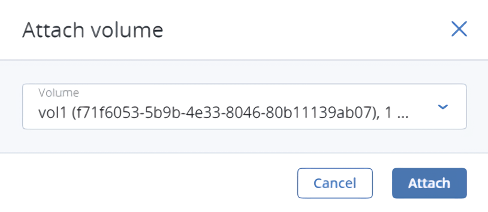
Select Volume in the Deploy from section, and then click Specify in the Volumes section.
In the Volumes window, click Attach.
In the Attach volume window, find and select the volume, and then click Attach.
If you attach more than one volume, the first attached volume becomes the boot volume, by default. To select another volume as bootable, place it first in the list by clicking the up arrow button next to it.
After selecting the boot media, volumes required for this media to boot will be automatically added to the Volumes section.
Configure the VM disks:
- In the Volumes window, make sure the default boot volume is large enough to accommodate the guest OS. Otherwise, click the ellipsis icon next to it, and then Edit. Change the volume size and click Save.
- (Optional) Add more disks to the VM by creating or attaching volumes. To do this, click the pencil icon in the Volumes section, and then Add or Attach in the Volumes window.
- Select volumes that will be removed during the VM deletion. To do this, click the pencil icon in the Volumes section, click the ellipsis icon next to the needed volume, and then Edit. Enable Delete on termination and click Save.
- When you finish configuring the VM disks, click Done.
(Optional) If you have any placements, the Placement drop-down list is displayed. Placements are created by the administrator to group nodes or VMs sharing a distinctive feature, like a special license. Select the placement corresponding to the VM characteristics. For more information, refer to Managing placements.
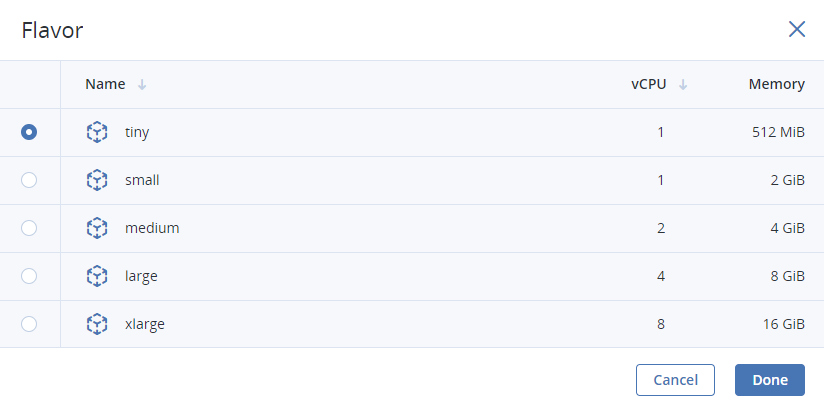
Choose the amount of RAM and CPU resources that will be allocated to the VM in the Flavor section. In the Flavor window, select a flavor, and then click Done.
Add network interfaces to the VM in the Networks section:
In the Networks interfaces window, click Add, select a compute network, and then click Add.
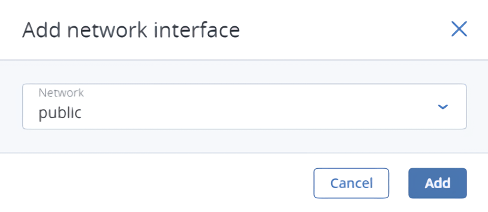
A network interface connected to the selected network will appear in the Network interfaces list.
(Optional) Edit additional parameters of newly added network interfaces, such as IP and MAC addresses and spoofing protection. To do this, click the ellipsis icon, click Edit, and then set the parameters. You will not be able to edit these parameters later. Instead, you will be able to delete the old network interface and replace it with a new one.
When you finish configuring the VM network interfaces, click Done.
(Optional) If you have chosen to boot from a template or volume, which has cloud-init and OpenSSH installed (refer to Preparing templates), do the following:
Important
As cloud images have no default password, you can access VMs deployed from them only by using the key authentication method with SSH.
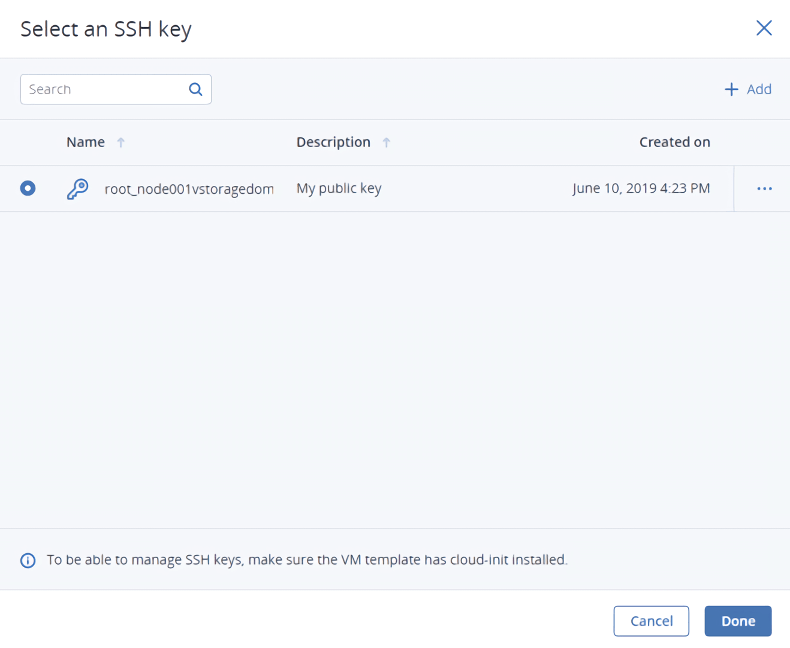
Add an SSH key to the VM, to be able to access it via SSH without a password. In the Select an SSH key window, select an SSH key and then click Done.
Add user data to customize the VM after launch, for example, change a user password. Write a cloud-config or shell script in the Customization script field or browse a file on your local server to load the script from.
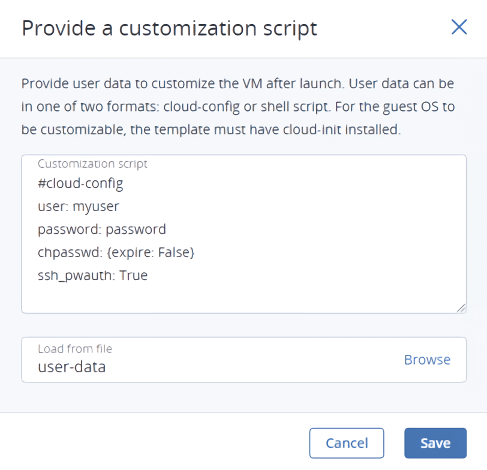
To inject a script in a Windows VM, refer to the Cloudbase-Init documentation. For example, you can set a new password for the account using the following script:
#ps1
net user <username> <new_password>
After configuring all of the VM parameters, click Deploy to create and boot the VM.
If you are deploying the VM from an ISO image, you need to install the guest OS inside the VM by using the built-in VNC console (refer to Connecting to virtual machines). Virtual machines created from a template or a boot volume already have a pre-installed guest OS.
5.4.3. Connecting to virtual machines
After a virtual machine is deployed, you can connect to it via the VNC console or SSH:
To connect to a VM via the built-in VNC console, click Console on the VM right pane. The console will open in a separate browser window. In the console, you can send a key combination to a VM, take a screenshot of the console window, and download the console log (refer to Troubleshooting virtual machines).
To be able to connect to a VM via SSH, make sure it has cloud-init and OpenSSH installed (refer to Preparing templates). To connect to a VM via SSH, specify the username and VM IP address in the SSH terminal:
# ssh <username>@<VM_IP_address>
Linux cloud images have the default login, depending on the operating system, for example,
centosorubuntu. To connect to a Windows VM, enter the username that you specified during Cloudbase-Init installation.If you have deployed a VM without specifying an SSH key, you also need to enter a password to log in to the VM.
5.4.4. Managing virtual machine power state
After you create a virtual machine, you can manage its power state by using available actions. To see the full list of actions available for the VM current state, click the VM or the ellipsis button next to a it. Yo can do the following:
- To power up a VM, click Run.
- To gracefully shut down a running VM, click Shut down. The default shutdown timeout, after which a virtual machine will be powered off, is 10 minutes. You can configure this timeout per VM by using the
vinfra service compute server stop --wait-timecommand (refer to vinfra service compute server stop). - To forcibly cut off power from a VM, click Power off.
- To softly reboot a running VM, click Reboot.
- To reboot a VM without the guest OS graceful shutdown, click Hard reboot.
- To save the current VM state to a file, click Suspend. This may prove useful, for example, if you need to restart the host but do not want to quit the applications currently running in the VM or restart its guest OS.
- To restore a VM from the suspended state, click Resume.
5.4.5. Reconfiguring and monitoring virtual machines
To monitor virtual machine’s CPU, storage, and network usage, select the VM and open the Monitoring tab.
The default time interval for the charts is twelve hours. To zoom into a particular time interval, select the internal with the mouse; to reset zoom, double-click any chart.
The following performance charts are available:
- CPU / RAM
- CPU and RAM usage by the VM.
- Network
- Incoming and outgoing network traffic.
- Storage read/write
- Amount of data read and written by the VM.
- Read/write latency
- Read and write latency. Hovering the mouse cursor over a point on the chart, you can also see the average and maximum latency for that moment, as well as the 95 and 99 percentiles.
Note
Averaged values are calculated every five minutes.
To reconfigure a VM, select it and, on the Overview tab, click the pencil icon next to a parameter you need to change. You cannot do the following:
- Change, detach, or delete the boot volume
- Manage non-boot volumes, except attaching and detaching
- Modify previously added network interfaces
- Attach and detach network interfaces to and from shelved VMs
- Change the flavor for running and shelved VMs
5.4.6. Shelving virtual machines
You can unbind a stopped VM from the node it is hosted on and release its reserved resources such as CPU and RAM. A shelved VM remains bootable and retains its configuration, including the IP addresses. To do this, click Shelve on the VM right pane.
Virtual machines in other states can be shelved by clicking Shut down or Power off, and then selecting the check box Shelve virtual machine in the confirmation window.
To spawn a shelved VM on a node with enough resources to host it, click Unshelve on the VM right pane.
5.4.7. Migrating virtual machines
Virtual machine migration helps facilitate cluster upgrades and workload balancing between compute nodes. Acronis Cyber Infrastructure allows you to perform two types of migration:
- Cold migration for stopped and suspended virtual machines
- Hot migration for running virtual machines (allows you to avoid VM downtime)
For both migration types, a virtual machine is migrated between compute nodes using shared storage, so no block device migration takes place.
Hot migration consists of the following steps:
- All VM memory is copied to the destination node, while the virtual machine keeps running on the source node. If a VM memory page changes, it is copied again.
- When only a few memory pages are left to copy, the VM is stopped on the source node, the remaining pages are transferred, and the VM is restarted on the destination node.
Large virtual machines with write-intensive workloads write to memory faster than memory changes can be transferred to the destination node, thus preventing migration from converging. For such VMs, the auto-converge mechanism is used. When a lack of convergence is detected during live migration, the VM’s vCPU execution speed is throttled down, which also slows down writing to the VM memory. Initially, the virtual machine’s vCPU is throttled by 20 percent and then by 10 percent during each iteration. This process continues until writing to the VM memory slows down enough for migration to complete or the VM vCPU is throttled by 99 percent.
Note
Virtual machines are created with the host CPU model, by default. Having compute nodes with different CPUs may lead to live migration issues. To avoid them, you can manually set the CPU model for all new VMs, as described in Setting virtual machine CPU model.
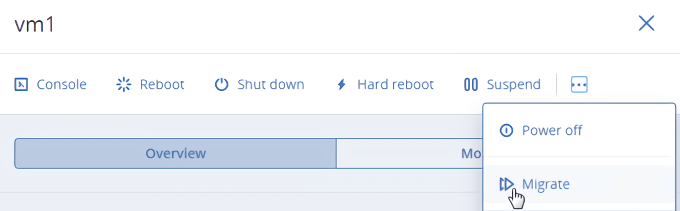
To migrate a VM, do the following:
On the Compute > Virtual machines > Virtual machines tab, click a VM to migrate, click the ellipsis button, and then select Migrate.
In the new window, specify the destination node:
- Auto. Automatically select the optimal destination among cluster nodes, based on available CPU and RAM resources.
- Select the destination node manually from the drop-down list.
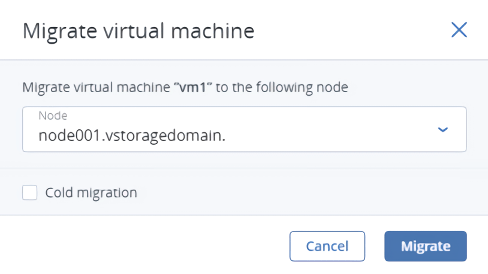
By default, running VMs are migrated live. You can change the migration mode to offline by selecting the Cold migration check box. A VM will be stopped and restarted on the destination node after migration.
Click Migrate to reserve resources on the destination node and start migration.
The admin panel will show the migration progress.
5.4.8. Configuring virtual machine high availability
High availability keeps virtual machines operational if the node they are located on fails due to a kernel crash, power outage, or becomes unreachable over the network. Graceful shutdown is not considered a failure event.
Important
The compute cluster can survive the failure of only one node.
In the event of failure, the system will attempt to evacuate the affected VMs automatically, that is, migrate them offline with auto-scheduling to other healthy compute nodes in the following order:
- VMs with the “Active” status are evacuated first and automatically started.
- VMs with the “Shut down” status are evacuated next and remain stopped.
- All other VMs are ignored and left on the failed node.
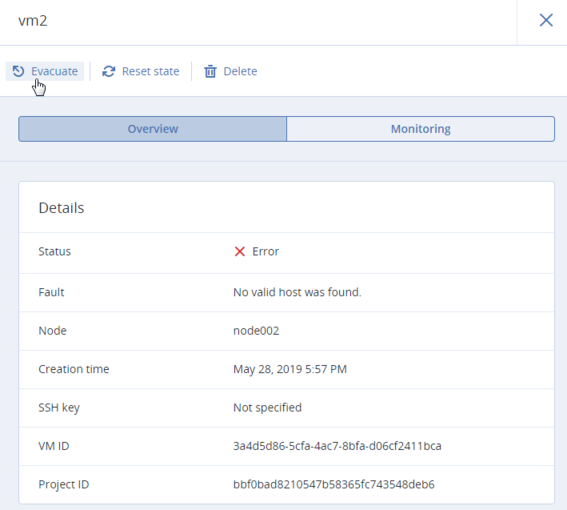
If something blocks the evacuation, for example, the destination compute nodes lack the resources to host the affected VMs, these VMs remain on the failed node and receive the “Error” status. You can evacuate them manually after solving the issue (providing sufficient resources, joining new nodes to the cluster, etc.). To do this, click Evacuate on the VM right pane.
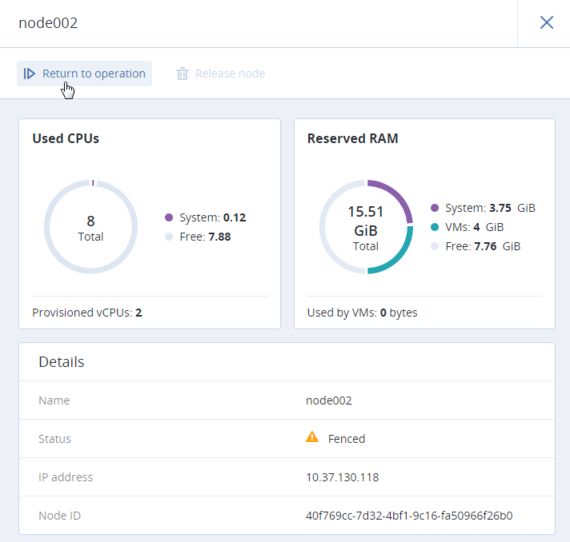
When the failed node becomes available again, it is fenced from scheduling new VMs on it and can be returned to operation manually. To do this, open the fenced node’s pane, and then click Return to operation.
By default, high availability for virtual machines is enabled automatically after creating the compute cluster. If required, you can disable it manually. Do the following:
- Click the VM for which you wish to disable high availability.
- On the VM right pane, click the pencil icon next to the High availability parameter.
- In the High availability window, disable high availability for the VM, and then click Save.
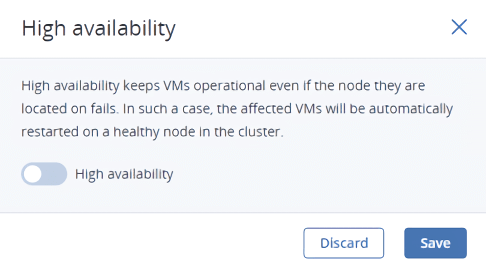
Virtual machines with disabled high availability will not be evacuated to healthy nodes in the case of a failover.
5.4.9. Rescuing virtual machines
Note
This feature is available via GUI only for Linux virtual machines. It is also available via the command line for Windows VMs, as described in Managing virtual machines.
If a VM experiences boot problems, you can send it to the rescue mode to access its boot volume. When a VM in the “Active” state is sent to the rescue mode, it is shut down softly first. Once the VM is in the rescue mode, you can connect to it via SSH or via the console. Its previous boot disk is now attached as a secondary one. You can mount the disk and repair it.
Before sending a VM to the rescue mode, consider the following:
- The rescue mode can only use qcow2 images (templates) for booting a VM. For instructions on making templates, refer to Preparing templates.
- You can send a VM to the rescue mode only if its current status is “Active” or “Shut down”.
- There are only three actions available for the VM in the rescue mode: Console, Exit rescue mode, and Delete.
- If a rescue image has cloud-init installed, then the VM booted from it can be accessed with the same SSH key that was used for its creation.
To put a VM to the rescue mode, follow the steps:
On the Compute > Virtual machines > Virtual machines tab, click the required VM on the list.
On the VM panel, click the ellipsis button on the toolbar. Then, click Enter rescue mode.

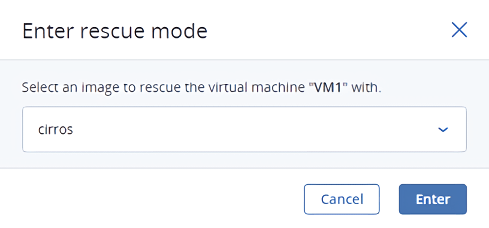
In the Enter rescue mode window, select an image to rescue the VM with. By default, the initial image used for creating the VM is selected. Click Enter.
The machine status changes to “Rescue”. To return the VM to normal operation from the rescue mode, follow these steps:
On the Compute > Virtual machines > Virtual machines tab, click the required VM on the list.
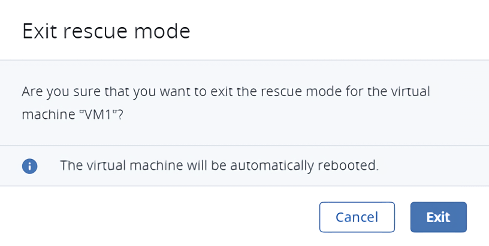
On the VM panel, click Exit rescue mode.
In the Exit rescue mode window, click Exit. The VM will be automatically rebooted.
The VM status changes to “Active” and it boots from the original root disk.
Note
If the VM status changes to “Error” when exiting the rescue mode, you can reset its status with the Reset state action. The VM should then return to the “Rescue” status again.
5.4.10. Managing guest tools
This section explains how to install and uninstall the guest tools. This functionality is required for Running commands in virtual machines without network connectivity, as well as for creating consistent snapshots of a running VM’s disks (refer to Managing volume snapshots).
5.4.10.1. Installing guest tools
Installation of the guest tools inside a virtual machine includes steps performed by users with different roles: a system administrator and a VM user.
As a system administrator, you need to do the following:
- Upload the guest tools ISO files located in the
/usr/share/vz-guest-tools/directory on any compute node to a network share or FTP server:- for a Windows guest, upload
vz-guest-tools-win.iso - for a Linux guest, upload
vz-guest-tools-lin.iso
- for a Windows guest, upload
- Provide access to the uploaded ISO file to a VM user.
As a VM user, log in to the virtual machine and do the following:
Inside a Windows VM:
- Download the Windows guest tools ISO image provided by your system administrator.
- Mount the image inside the VM.
- On Windows 8 or Windows Server 2012 or newer, you can natively mount an ISO image. To do this, right-click the guest tools ISO image and select Mount.
- On Windows 7 and Windows Server 2008, you need a third-party application to mount ISO images.
- Go to the mounted optical drive in Explorer and install the guest tools by running
setup.exe. - After the installation is complete, restart the VM.
Inside a Linux VM:
Download the Linux guest tools ISO image provided by your system administrator.
Create a mount point for the optical drive with the guest tools image and run the installer:
# mkdir /mnt/cdrom
# mount <path_to_guest_tools_iso> /mnt/cdrom
# bash /mnt/cdrom/install
Note
Guest tools rely on the QEMU guest agent that is installed alongside the tools. The agent service must be running for the tools to work.
5.4.10.2. Uninstalling guest tools
If you find out that the guest tools are incompatible with some software inside a virtual machine, you can uninstall them as follows:
Inside a Windows VM:
Remove the QEMU device drivers from the device manager.
Important
Do not remove the VirtIO/SCSI hard disk driver and NetKVM network driver. Without the former, the VM will not boot; without the latter, the VM will lose network connectivity.
Uninstall the QEMU guest agent and guest tools from the list of installed applications.
Stop and delete Guest Tools Monitor:
> sc stop VzGuestToolsMonitor
> sc delete VzGuestToolsMonitor
Unregister Guest Tools Monitor from Event Log:
> reg delete HKLM\SYSTEM\CurrentControlSet\services\eventlog\Application\\
VzGuestToolsMonitor
Delete the autorun registry key for RebootNotifier:
> reg delete HKLM\SOFTWARE\Microsoft\Windows\CurrentVersion\Run /v \
VzRebootNotifier
Delete the
C:\Program Files\Qemu-ga\directory.If
VzGuestToolsMonitor.exeis locked, close all the Event Viewer windows. If it remains locked, restart theeventlogservice:> sc stop eventlog > sc start eventlog
After removing the guest tools, restart the virtual machine.
Inside a Linux VM:
Remove the packages:
On RPM-based systems (CentOS and other):
# yum remove dkms-vzvirtio_balloon prl_nettool qemu-guest-agent-vz vz-guest-udev
On DEB-based systems (Debian and Ubuntu):
# apt-get remove vzvirtio-balloon-dkms prl-nettool qemu-guest-agent-vz vz-guest-udev
If any of the packages listed above are not installed on your system, the command will fail. In this case, exclude these packages from the command and run it again.
Remove the files:
# rm -f /usr/bin/prl_backup /usr/share/qemu-ga/VERSION /usr/bin/install-tools \
/etc/udev/rules.d/90-guest_iso.rules /usr/local/bin/fstrim-static /etc/cron.weekly/fstrim
Reload the
udevrules:# udevadm control --reload
After removing guest tools, restart the virtual machine.
5.4.11. Troubleshooting virtual machines
If a VM fails to deploy, you can view the error message on its right pane. One of the possible root causes is that compute nodes lack free RAM or CPU resources to host the VM.
If a VM is stuck in a failed or transitional state, you can reset the VM to its last stable state: active, shut down or shelved. To do this, click Reset state on the VM right pane.
If a VM is stuck with the “Powering off” task state (it is shown as the “Active (Powering off)” status on the VM right pane), you can cancel this task by running vinfra service compute server cancel-stop (refer to vinfra service compute server cancel-stop). The command will cancel the guest OS shutdown and return the VM to the active state.
To troubleshoot a VM, you can also examine the VM console log by clicking Download console log on the VM right pane. The log will contain log messages only if logging is enabled inside the VM, otherwise the log will be empty. To enable logging, do the following:
In Linux VMs, enable the TTY1 and TTYS0 logging levels:
Add the line
GRUB_CMDLINE_LINUX_DEFAULT="console=tty1 console=ttyS0"to the file/etc/default/grub.Depending on the boot loader, run either
# grub-mkconfig -o /boot/grub/grub.cfg
or
# grub2-mkconfig -o /boot/grub2/grub.cfg
Reboot the VM.
In Windows VMs, enable Emergency Management Services (EMS) console redirection:
Start Windows PowerShell by using administrator privileges.
In the PowerShell console, set the COM port and baud rate for EMS console redirection. As Windows VMs have only the COM1 port with the transmission rate of 9600 bps, run:
bcdedit /emssettings EMSPORT:1
Enable EMS for the current boot entry:
bcdedit /ems on
You may also enable driver status logging to see the list of loaded drivers. This can be useful for troubleshooting a faulty driver or long boot process. Do the following:
- Start System Configuration by using administrator privileges.
- In the System Configuration windows, open the Boot tab, and select the check boxes OS boot information and Make all boot settings permanent.
- Confirm the changes and restart the system.
5.4.12. Deleting virtual machines
To remove a virtual machine, click its ellipsis button, and then click Delete. To remove multiple VMs at once, select them, and then click Delete.
A VM is removed along with its disks that have the Delete on termination option enabled during the VM deployment.