5.1. Migrating Backups from Acronis Storage 1.5
Update all Acronis Storage 1.5 nodes to version 1.5.65665 or newer as earlier versions are not eligible for migration. To do this, log in to the Acronis Storage web console, proceed to SETTINGS > Software Update, upload the latest ISO image, and click Update.
Log in to the new Acronis Storage cluster and on the SERVICES > Acronis Backup Gateway > Nodes screen, select one or more nodes and click Migrate.
Select Acronis Storage 1.5 and click NEXT.
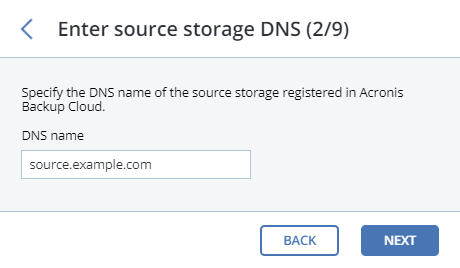
Specify the DNS name of the source storage registered in Acronis Backup Cloud and click NEXT.
Provide the credentials for the cloud management portal of the Acronis Backup Cloud installation that the source storage is registered in and click NEXT.
Enable SSH access on all FES nodes of Acronis Storage 1.5 as instructed and click NEXT.
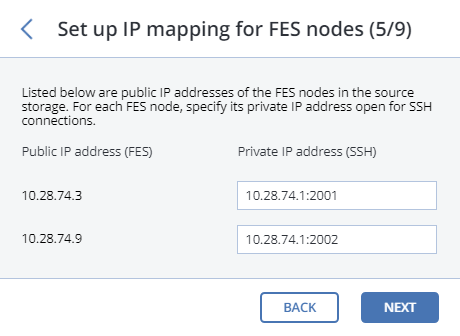
Map the public IP addresses of FES nodes accessible via SSH to their private IP addresses and click NEXT. This step is required to access FES nodes via SSH through tunnels.
Choose a destination storage type to create a gateway to:
- local Acronis Storage cluster,
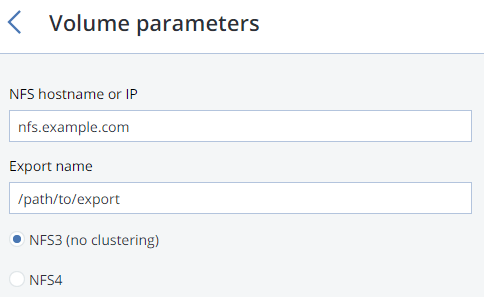
- external NFS, or
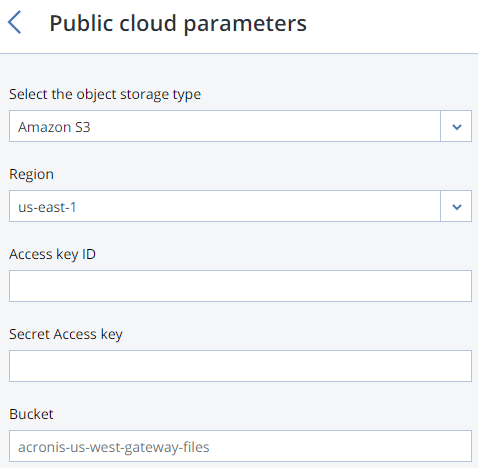
- public cloud.
Make sure a network interface with the ABGW private role is selected in the drop-down list. The corresponding interfaces with the ABGW public role will be selected automatically. Click NEXT.
Note
If necessary, click the cogwheel icon and assign the required role(s) to network interfaces on the Network Configuration screen.
Configure the destination storage backend:
For a storage cluster, select the desired tier, failure domain, and redundancy mode.
For NFS, specify a hostname or IP address, an export name and path, and choose the NFS version.
For public cloud, select a public cloud provider, specify credentials, and the name of the folder (bucket, container).
Important
You must update Acronis Backup Agents to version 12.0.4492 (Windows/Mac) or 12.0.4470 (Linux). Otherwise agents’ attempts to place backups in the new storage backend will result in “Backup failed” errors.
Click NEXT.
Review the source and destination storages and click PROCEED.
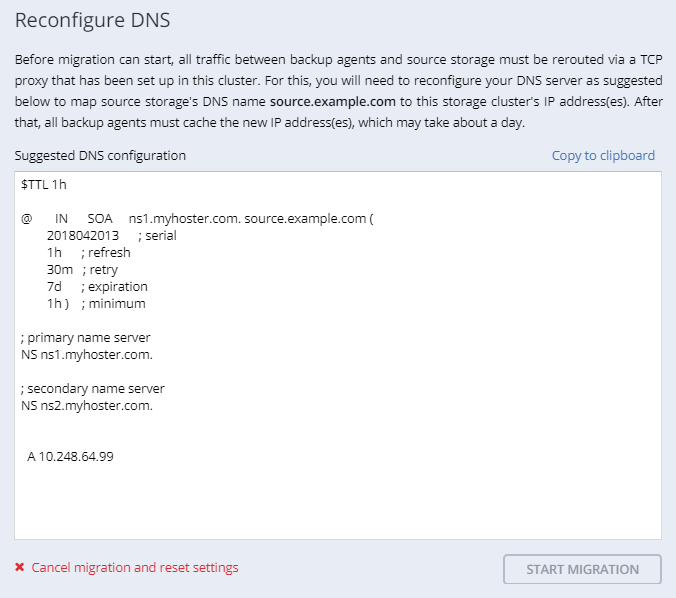
On the next panel, follow the instructions to point the source storage DNS name to the IP addresses of your new Acronis Storage cluster. Having updated the DNS configuration, wait for 24 hours for all backup agents to cache the new IP addresses. Until this happens, the START MIGRATION button will be disabled. After all backup agents have been rerouted to the new cluster, the button will become enabled and you can click it to start migration.
Depending on data size, migration may take as long as several days.