6.8. Migrating backups from older Acronis solutions
By means of Backup Gateway, you can migrate backups from Acronis Storage 1.5 and Acronis Storage Gateway 1.6 and 1.7 to a storage backend of your choice: the local storage cluster, external NFS, or public cloud.
Migration to NFS backends is not available, however, if multiple nodes are selected as Backup Gateway.
Important
Before you proceed, make sure that the destination storage has enough space for both existing and new backups.
The migration procedure can be described as follows:
Root credentials for SSH access to the chosen source storage are provided to Backup Gateway.
Backup Gateway sets up a proxy on the source storage that starts redirecting incoming requests from Acronis Backup Agents from the source storage to Backup Gateway.
Backup Gateway starts relocating backups to the chosen storage backend. The data that remains to be migrated is shown in the Migration Backlog section on the Backup Gateway Overview screen. When the backlog empties, all data has been migrated.
After the migration has started, the data of new and incremental backups is stored on the destination storage. Backups from the source storage are pulled in the background. The entire process is transparent to backup agents, which continue working uninterrupted.
To be able to dispose of the source storage after migration completes, requests from Acronis Backup Agents are directed straight to Backup Gateway, bypassing the proxy on the source storage. The steps that you need to take depend on how the source storage is registered in Acronis Cyber Backup Cloud:
If the source storage is already registered under the DNS name, you need to change the IP address behind it to those of the Backup Gateway nodes.
If the source storage is registered under the IP address, it is strongly recommended to re-register Backup Gateway in Acronis Cyber Backup Cloud under a DNS name that resolves into the IP addresses of the Backup Gateway nodes. Using a DNS name will provide a smoother transition and you will not need to reconfigure Acronis Cyber Backup Cloud even if you change nodes in the Backup Gateway (you will still need to adjust the IP addresses behind the DNS name accordingly).
Alternatively, if you do not want to use a DNS name, you need to wait for the migration to complete, shut down both the source and destination machines, and reconfigure your network so that the public interface of the destination machine gets the IP address of the source machine.
The concrete steps that you need to perform in the admin panel to initiate backup migration are described in the next subsections.
6.8.1. Migrating backups from Acronis Storage 1.5
Update all Acronis Storage 1.5 nodes to version 1.5.65665 or newer as earlier versions are not eligible for migration. To do this, log in to the Acronis Storage web console, proceed to Settings > Software Update, upload the latest ISO image, and then click Update.
Log in to the new storage cluster. On the Storage services > Backup storage > Nodes screen, select one or more nodes, and then click Migrate.
Select Acronis Storage 1.5, and then click Next.
Specify the DNS name of the source storage registered in Acronis Cyber Backup Cloud, and then click Next.
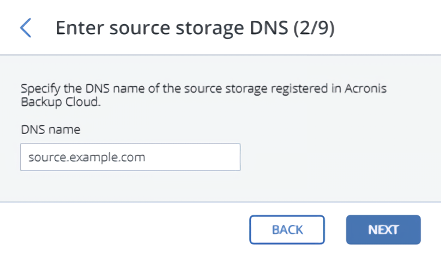
Provide the credentials for the cloud management portal of the Acronis Cyber Backup Cloud installation that the source storage is registered in, and then click Next.
Enable SSH access on all FES nodes of Acronis Storage 1.5 as instructed, and then click Next.
Map the public IP addresses of FES nodes accessible via SSH to their private IP addresses, and then click Next. This step is required to access FES nodes via SSH through tunnels.
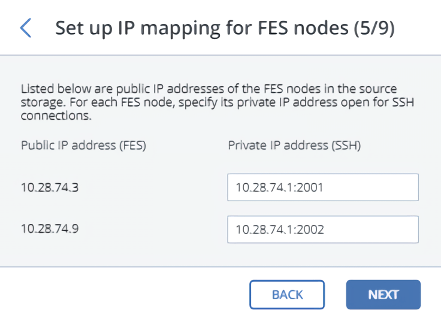
Choose a storage type to create a gateway to one of the destinations:
- Local storage cluster
- External NFS
- Public cloud
Make sure the correct network interface is selected in the drop-down list. Click Next.
If necessary, click the cogwheel icon and configure the node’s network interfaces on the Network configuration screen.
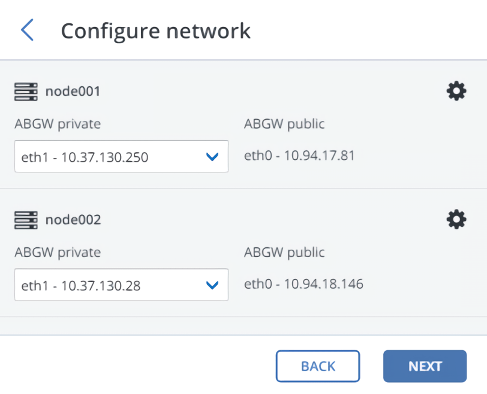
Configure the destination storage backend:
For a storage cluster, select the desired tier, failure domain, and redundancy mode.
For NFS, specify a hostname or IP address, an export name and path, and choose the NFS version.
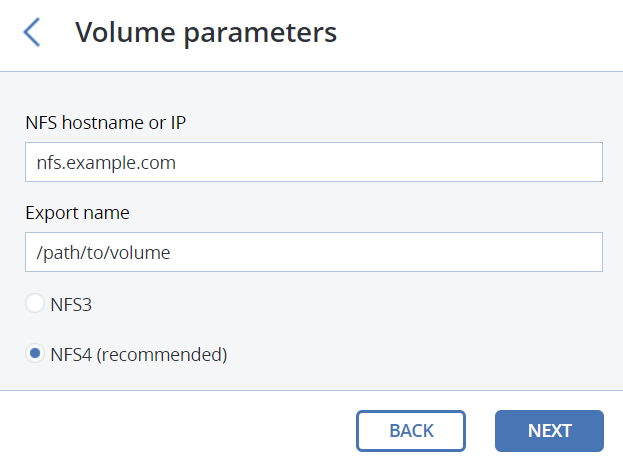
For a public cloud, select a public cloud provider, specify credentials, and the name of the folder (bucket, container).
A separate object container should be used for each Backup Gateway cluster.
Click Next.
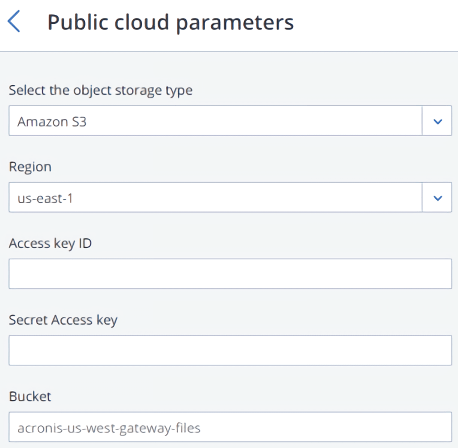
Review the source and destination storages, and then click Proceed.
On the next pane, follow the instructions to point the source storage DNS name to the IP addresses of your new storage cluster. Having updated the DNS configuration, wait for 24 hours for all backup agents to cache the new IP addresses. Until this happens, the Start migration button will be disabled. After all backup agents have been rerouted to the new cluster, the button will become enabled and you can click it to start migration.
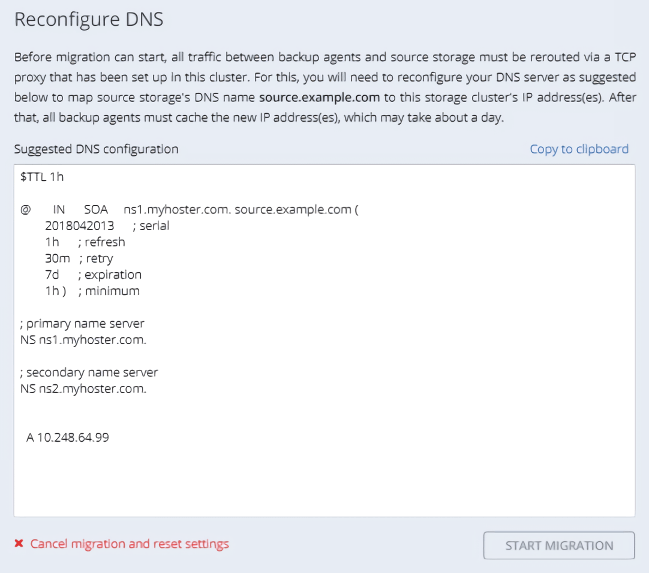
Depending on data size, migration may take as long as several days.
6.8.2. Migrating backups from Acronis Storage Gateway 1.6 and 1.7 (NFS)
Disable the firewall or explicitly open TCP port 44446 on the source Acronis Storage Gateway.
To disable the firewall, run
# systemctl stop firewalld
To open TCP port 44446 in the firewall, do the following:
Find out the zone where port 44445 is open:
# firewall-cmd --list-all-zones | grep active
mix_eth0 (active)
Add the required port to the same zone:
# firewall-cmd --zone=mix_eth0 --permanent --add-port=44446/tcp
# firewall-cmd --reload
In the admin panel of the backup gateway node, proceed to Storage services > Backup storage > Nodes, select the node(s) to run the gateway services on, and then click Migrate.
Select the source storage version, and then click Next.
Specify the connection details for the source storage, and then click Next.
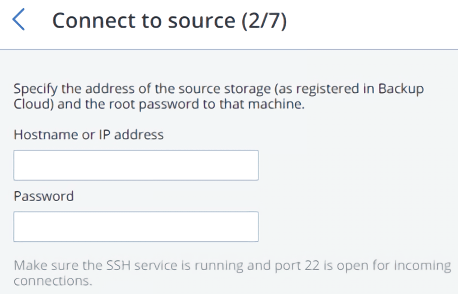
Provide the credentials for the cloud management portal of the Acronis Cyber Backup Cloud installation that the source storage is registered in, and then click Next.
If the source storage is registered in Acronis Cyber Backup Cloud under an IP address, you will see the DNS configuration screen. On it, click Re-register with DNS and specify the source storage DNS name (recommended, refer to above). Or, if you want to keep using the IP address, click Proceed with IP.
If you specified a DNS name, configure your DNS server according to the suggested example.
Important
Each time you change the network configuration of nodes in the Backup Gateway cluster, adjust the DNS records accordingly.
Choose a storage type to create a gateway to one of the destinations:
- Local storage cluster
- External NFS
- Public cloud
Make sure the correct network interface is selected in the drop-down list. Click Next.
If necessary, click the cogwheel icon and configure the node’s network interfaces on the Network configuration screen.

Configure the destination storage backend:
For a storage cluster, select the desired tier, failure domain, and redundancy mode.
For NFS, specify a hostname or IP address, an export name and path, and choose the NFS version.

For a public cloud, select a public cloud provider, specify credentials, and the name of the folder (bucket, container).
A separate object container should be used for each Backup Gateway cluster.
Click Next.

Review the source and destination storages, and click Start migration.
Depending on data size, migration may take as long as several days.
