6.3. Connecting to the local storage cluster via Backup Gateway
Before you proceed, make sure that the destination storage has enough space for both existing and new backups.
To set up Backup Gateway, do the following:
On the Infrastructure > Networks screen, make sure that the ABGW private and ABGW public traffic types are added to the networks you intend to use.
In the left menu, click Storage services > Backup storage.
Select the node(s) to run the gateway services on, and then click Create gateway on the right pane.
Note
The nodes are displayed with small icons representing their roles within a cluster. For more information on the icons, refer to https://kb.acronis.com/content/61024.
Select This Acronis Cyber Infrastructure cluster as storage type.
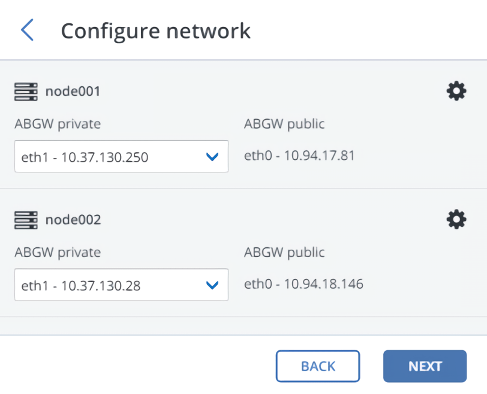
Make sure the correct network interface is selected in the drop-down list. Click Next.
If necessary, click the cogwheel icon and configure the node’s network interfaces on the Network configuration screen.
On the Volume Parameters pane, select the desired tier, failure domain, and data redundancy mode. For more information, refer to Understanding storage tiers, Understanding failure domains, and Understanding data redundancy. Click Next.
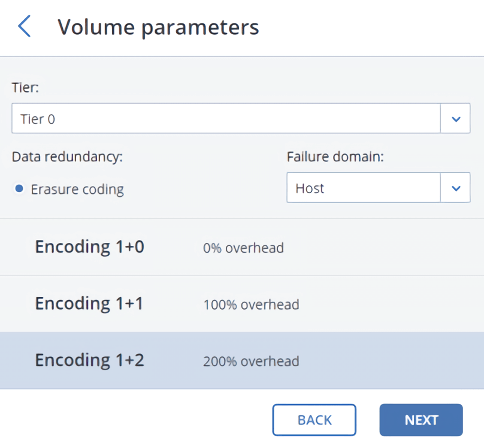
Redundancy by replication is not supported for Backup Gateway. For erasure coding, changing the redundancy scheme is disabled, because it may decrease cluster performance. This is because re-encoding demands a significant amount of cluster resources for a long period of time. If you still want to change the redundancy scheme, contact the technical support team.
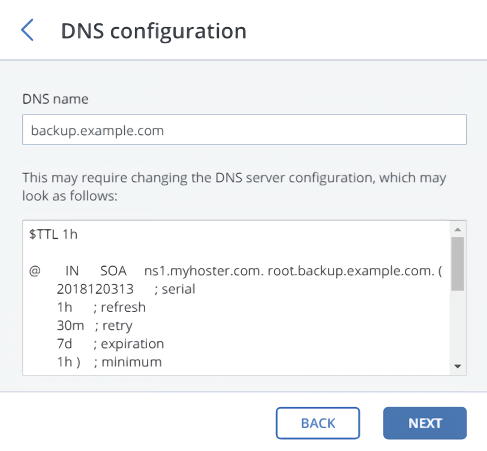
On the DNS Configuration pane, specify the external DNS name for this gateway, for example,
backupgateway.example.com. Make sure that each node running the gateway service has a port open for outgoing Internet connections and incoming connections from your Acronis backup software. The backup agents will use this address and port to upload the backup data. Click Next.Important
Configure your DNS server according to the example suggested in the admin panel.
Note
For complex environments, HAProxy might be used to build a scalable and redundant load balancing platform, which can be easily moved or migrated and is independent from Acronis Cyber Infrastructure. For more information, refer to https://kb.acronis.com/content/64787.
Important
Each time you change the network configuration of nodes in the Backup Gateway cluster, adjust the DNS records accordingly.
On the Register in backup software pane, specify the following information for your Acronis product:
Important
Make sure that two-factor authentication (2FA) is disabled for your partner account. You can also disable it for a specific user within a 2FA-enabled tenant, as described in Acronis Cyber Cloud documentation, and specify the user credentials.
- In Address, specify the address of the Acronis Cyber Backup Cloud management portal (for example, https://cloud.acronis.com/) or the hostname/IP address and port of the Acronis Cyber Backup management server (for example, http://192.168.1.2:9877).
- In Account, specify the credentials of a partner account in the cloud or of an organization administrator on the local management server.
Finally, click Done.