7.5. Restricting access to target groups
You can restrict access to entire target groups (and all volumes attached to them) by using ACL-based authorization, as well as password-based authentication (CHAP).
7.5.1. Managing access control lists
An access control list (ACL) limits access to chosen LUNs for specific initiators. Initiators not on the list have access to all LUNs in iSCSI target groups. Volumes exported via Fibre Channel target groups, however, can only be accessed by initiators that are added to a group ACL.
To add an initiator to a target group’s ACL, do the following:
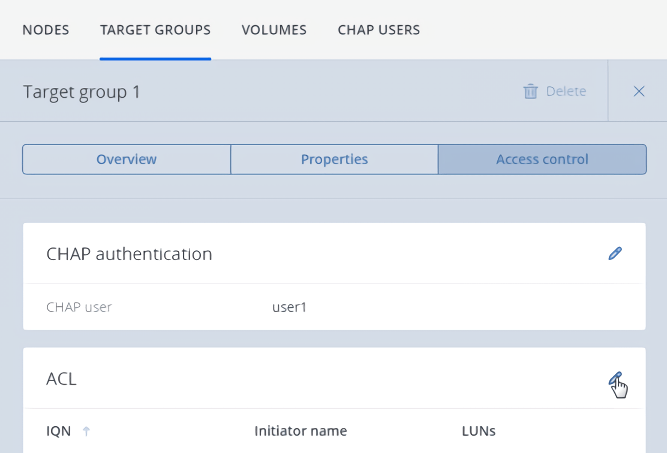
Open Storage services > Block storage > Target groups, and then click the desired target group in the list (anywhere except the group’s name).
In the group right pane, click Access control, and then click the pencil icon.
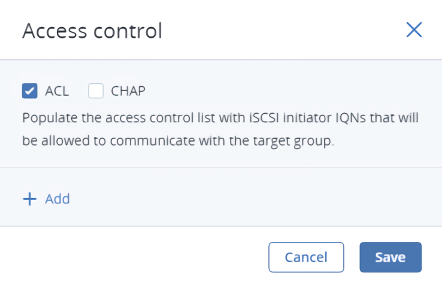
In the Access control window, select the ACL check box, and then click Add.
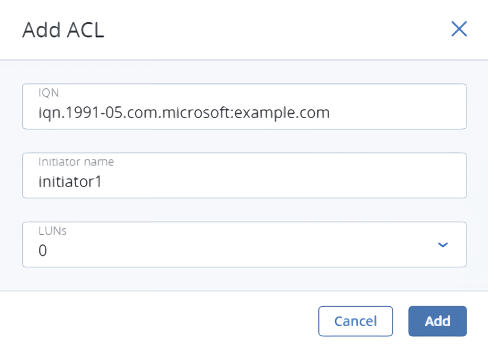
In the Add ACL window, specify the initiator’s IQN, enter an alias, select the LUNs that it will be able to access, and then click Add. The initiator will appear in the ACL.
Having populated the ACL with initiators, click Save.
To edit or delete initiators in the ACL, do the following:
- Click the pencil icon in target group details.
- In the Access control window, click the pencil icon of the desired initiator, and then click Edit or Delete.
- Having changed the ACL, click Save.
7.5.2. Managing CHAP users
The Challenge-Handshake Authentication Protocol (CHAP) provides a way to restrict access to targets and their LUNs by requiring a user name and a password from the initiator. CHAP accounts apply to entire target groups. Fibre Channel target groups do not use CHAP.
To restrict access to a target group to a specific CHAP user, do the following:
Open Storage services > Block storage > Target groups, and then click the desired target group in the list (anywhere except the group’s name).
In the group right pane, click Access control, and then click the pencil icon.
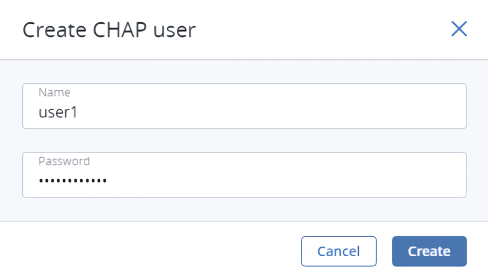
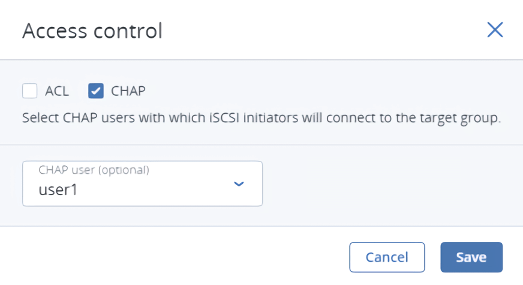
In the Access control window, select the CHAP check box, and then click Create user.
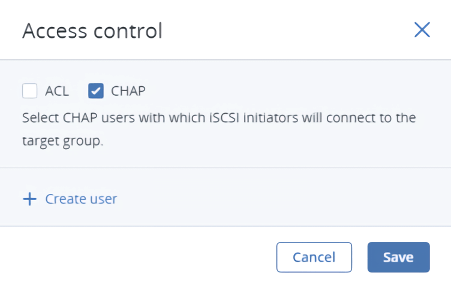
In the Create CHAP user window, enter a user name and a password (12 to 16 characters long). Click Create.
Back on the Access control screen, select the desired CHAP user, and click Save.
To change the password of a CHAP user, do the following:
- Open Storage services > Block storage > CHAP users, click a user to open its right pane, and click the pencil icon.
- In the Edit CHAP user window, specify a new password, and then click Apply.
To delete a CHAP user that is not added to any ACLs, open Storage services > Block storage > CHAP users, click the ellipsis icon of the user, and then click Delete.