4.10. Managing Placements
A placement is a group of nodes in the compute cluster that share a distinctive feature. It can be a special license for software to run in VMs or an advanced CPU model. You can create placements to make sure that VMs that need a specific feature are located on nodes that have it. The same node can be included into several placements.
Take note of the following:
- A virtual machine that is assigned a placement can only be migrated between nodes in this placement. Similarly, a VM without a placement can only be migrated between nodes that are not in placements. When adding nodes to placements, make sure to provide migration options for various scenarios, including high availability and maintenance. Avoid situations when VMs cannot migrate because of limitations imposed by placements.
- Self-service users can only use placements by creating VMs from images added to those placements. If all the nodes are in placements, make sure that at least one image is added to a placement. Otherwise self-service users will not be able to create virtual machines.
4.10.1. Creating Placements
To create a placement, follow these steps:
In the admin panel, open COMPUTE > Nodes and switch to the PLACEMENTS tab. Click Create placement.
Specify a name for the new placement. The name should clearly state the distinctive feature of nodes in the placement. For example,
Microsoft Windows Server license.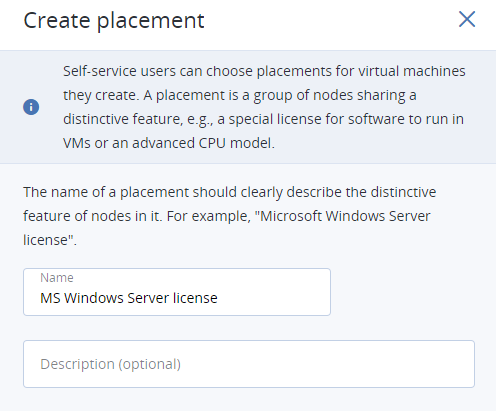
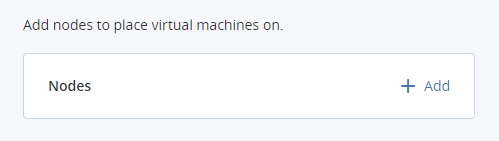
Select nodes to be included in the placement.
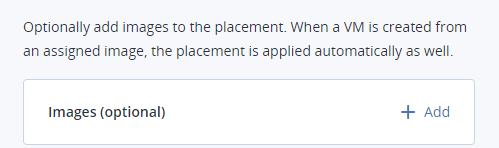
Optionally, add images to the placement. VMs created from such images will automatically be added to the placement.
Click Create.
The new placement will appear in the list.
4.10.2. Managing Nodes in Placements
To add a node to a placement, do as follows:
- In the admin panel, open COMPUTE > Nodes and switch to the PLACEMENTS tab. Click the required placement.
- In the Nodes pane, click Add.
- Select the nodes to be included in the placement and click Add.
To remove nodes from a placement, select them on the placement’s nodes pane and click Remove.
If the node has virtual machines on it, they will not automatically inherit the changes to node’s placement configuration. That is, if you add a node with VMs to a placement, the VMs will not be assigned the same placement. If you delete such a node from a placement, the VMs will still keep that placement. You will have to edit virtual machines’ placement configuration accordingly using the vinfra service compute server set command. Make sure that the node and its VMs have the same placement configuration.
4.10.3. Managing Images in Placements
To have VMs deployed from an image added to a placement automatically, add that image to a placement. You can do this with images that are shared between all projects (see Managing Images).
Do the following:
- In the admin panel, open COMPUTE > Nodes and switch to the PLACEMENTS tab. Click the required placement.
- Click Add images on the toolbar.
- Select one or more images and click Add.
When you choose this image while creating a VM, the corresponding placement will be selected automatically.
You can also use an image added to a placement to create a volume added to the same placement (see Creating, Editing, and Removing Volumes). Snapshots and virtual machines created from this volume will inherit the placement too.
To remove an image from a placement, open the placement details, switch to the Images tab and click the bin icon next to the image you want to remove.
4.10.4. Renaming Placements
To rename a placement, do the following:
- In the admin panel, open COMPUTE > Nodes and switch to the PLACEMENTS tab.
- Select the required placement and click Edit on the toolbar.
- Enter a new name and click Save.
4.10.5. Deleting Placements
Prior to deleting a placement, make sure there are no nodes in it. A placement with nodes cannot be deleted. Remove nodes from the placement, if any, and proceed as follows:
- In the admin panel, open COMPUTE > Nodes and switch to the PLACEMENTS tab.
- Select the required placement and click Delete on the toolbar.
- In the confirmation message, click Delete placement.