9.4. Creating NFS exports
The process of creating NFS exports includes the following steps:
- Creating a root export that will contain user exports.
- Mounting the root export.
- Creating user exports in the mounted root export.
9.4.1. Creating the root export
To create the root NFS export, do the following:
On the Storage services > NFS > Shares screen, click the number in the Exports column in the row of the desired share. This will open the share screen.
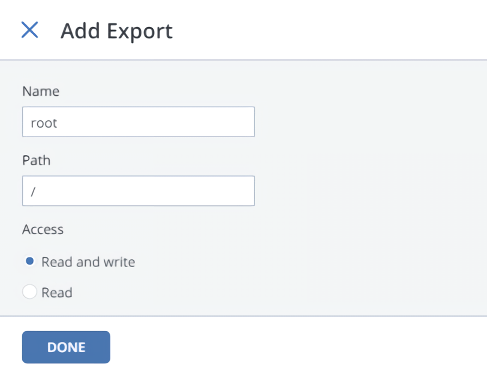
On the share screen, click Add export, specify
rootas the export name and/as the path, and then select theread and writeaccess mode.Important
Do not use other names or paths for the root export.
This will create a directory with a default path that designates the export location inside the share. This path is automatically generated based on the share name and used (alongside the share’s IP address) to mount the export.
Important
Do not give the users access to the root export.
The root export will be shown in the export list.
After creating the root export, mount it, as described in the Storage User’s Guide.
Warning
Do not mount NFS shares on cluster nodes. It may lead to node freeze.
9.4.2. Creating user exports
After creating and mounting the root export, you can proceed to creating user NFS exports. To do this:
- In the mounted root export, create a subdirectory for a user export, for example,
export1. - On the share screen, click Add export, enter a user export name, specify
/export1as the path, and then select the access mode. - Click Done.
The user export will appear in the export list.