4.8. Managing Load Balancers
Acronis Cyber Infrastructure offers load balancing as a service for the compute infrastructure. Load balancing ensures fault tolerance and improves performance of web applications by distributing incoming network traffic across virtual machines from a balancing pool. A load balancer receives and then routes incoming requests to a suitable VM based on a configured balancing algorithm and VM health.
Note the following requirements:
- A load balancer can only operate in networks with enabled IP management.
- All VMs in balancing pools must have fixed IP addresses.
You can create a load balancer with balancing pools as follows:
On the Load balancers screen, click Create load balancer.
In the Create load balancer window, do the following:
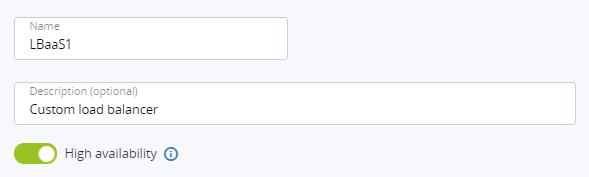
- Specify a name and optionally description.
- Enable or disable high availability:
- With high availability enabled, two load balancer instances will be created. They will work in the Active/Standby mode according to the Virtual Router Redundancy Protocol (VRRP).
- With high availability disabled, a single load balancer instance will be created.
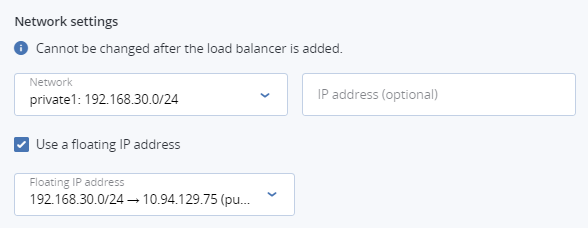
In the Network settings section, select the network that the load balancer will operate in and optionally specify an IP address that will be allocated to the load balancer.
If a chosen private network is connected to a public network via a router, you can assign a floating IP address to the load balancer. To do it, select Use a floating IP address, and from the drop-down menu that appears, choose either to use an available floating IP address or to create a new one.
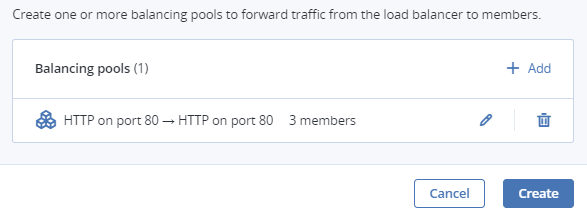
In the Balancing pools section, create a balancing pool to forward traffic from the load balancer to virtual machines by clicking Add.
In the Create balancing pool window that opens, do the following:
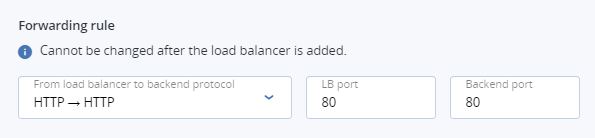
In the Forwarding rule section, select a forwarding rule from the load balancer to the backend protocol: HTTPS -> HTTPS, HTTPS -> HTTP, HTTP -> HTTP, or TCP -> TCP. Additionally, specify the ports for incoming and destination connections in the LB port and Backend port fields.
Note the following:
- With the HTTPS -> HTTPS rule, all virtual machines need to have the same SSL certificate (or a certificate chain).
- With the HTTPS -> HTTP rule, you need to upload an SSL certificate (or a certificate chain) in the PEM format and a private key in the PEM format.
Important
The forwarding rule cannot be changed after the load balancer is created.
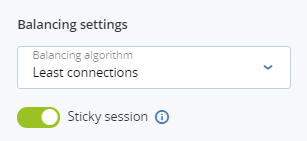
In the Balancing settings section, choose a balancing algorithm:
- Least connections. Requests will be forwarded to the VM with the least number of active connections.
- Round robin. All VMs will receive requests in the round-robin manner.
- Source IP. Requests from a unique source IP address will be directed to the same VM.
Enable/disable the Sticky session option to enable/disable session persistence. The load balancer will generate a cookie that will be inserted into each response. The cookie will be used to send future requests to the same VM.
Note
This option is not available in the SSL passthrough mode.
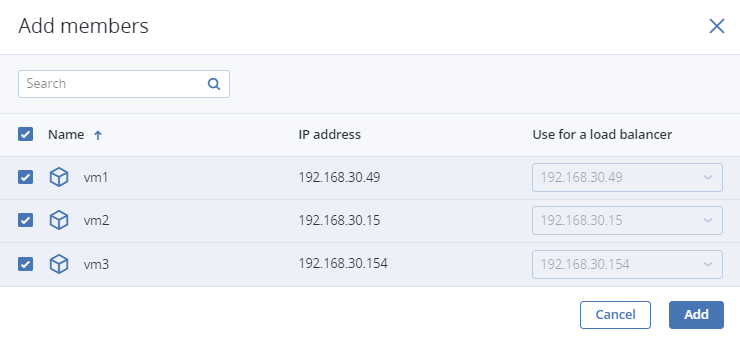
In the Members section, add members, i.e. virtual machines, to the balancing pool by clicking Add. Each VM can be included to multiple balancing pools.
In the Add members window that opens, select desired VMs and click Add.
In the Health monitor section, choose the protocol that will be used for monitoring members availability:
- HTTP/HTTPS. The HTTP/HTTPS method GET will be used to check for the response status code 200. Additionally, specify the URL path to the health monitor.
- TCP. The health monitor will check the TCP connection on the backend port.
- PING. The health monitor will check members’ IP addresses.
Important
The protocol cannot be changed after the load balancer is created.
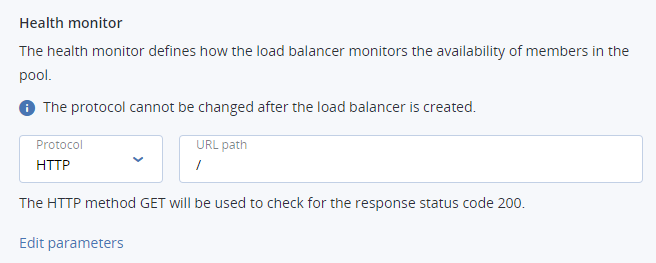
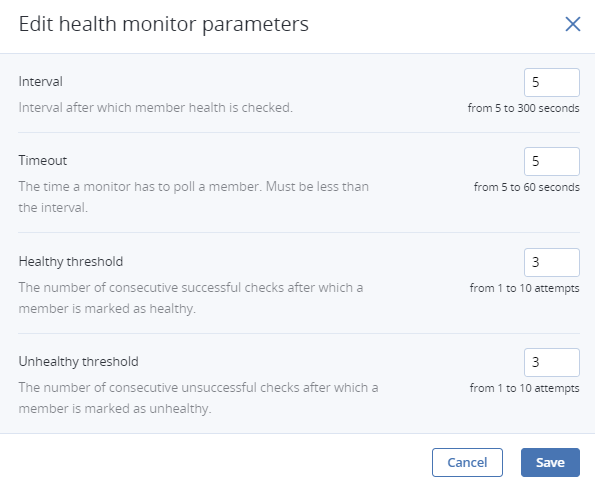
By default, the health monitor removes a member from a balancing pool if it fails three consecutive health checks of five-second intervals. When a member returns to operation and responds successfully to three consecutive health checks, it is added to the pool again. You can manually set the health monitor parameters, such as the interval after which VM health is checked, the time after which the monitor times out, healthy and unhealthy thresholds. To change the default parameters, click Edit parameters, enter the desired values, and click Save.
Click Create.
Add more balancing pools as described above, if required.
Click Create.
Once the load balancer is created, you can monitor its performance and health on the Overview tab of its panel.
The following charts are available:
- Members state
- The total number of members in the balancing pools grouped by status: “Healthy”, “Unhealthy”, “Error”, and “Disabled”.
- CPU/RAM
- CPU and RAM usage by the load balancer.
- Network
- Incoming and outgoing network traffic.
- Active connections
- The number of active connections.
- Error requests
- The number of error requests.
You can see the load balancer parameters on its Properties tab.
To edit the name or description of a load balancer, click the ellipsis icon next to it and Edit.
To disable/enable or remove a load balancer, click the ellipsis icon next to it and the desired action. To remove multiple load balancers at once, select them and click Delete.
4.8.1. Managing Balancing Pools
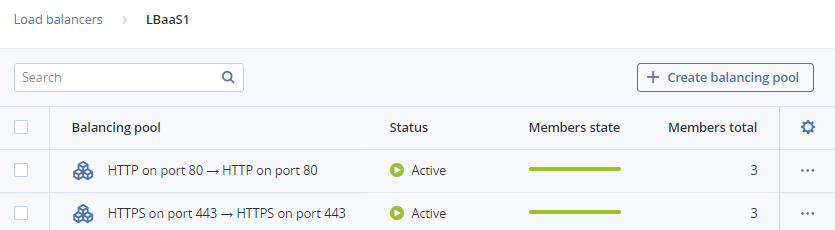
To see a list of balancing pools in a load balancer, click its name.
To add another balancing pool to a load balancer, click Create balancing pool and fill in the fields as described in Managing Load Balancers. The newly added pool will appear in the list of balancing pools.
You can open the pool’s panel to monitor its performance and health on the Overview tab, see its parameters on the Properties tab, and manage its members on the Members tab.
To edit the balancing settings such as the balancing algorithm and session persistence, click the ellipsis icon next to a pool and Edit. To edit the health monitor parameters, click the ellipsis icon next to a pool and Edit health monitor.
To add more members to a balancing pool, click the ellipsis icon next to it and + Add members.
To remove a balancing pool, click the ellipsis icon next to it and click Delete. To remove multiple balancing pools at once, select them and click Delete.