4.2. Managing Kubernetes Clusters
Self-service users can deploy ready-to-use Kubernetes clusters with persistent storage for managing containerized applications.
The prerequisites for creating a Kubernetes cluster are:
- The Kubernetes-as-a-service component. It can be deployed along with the compute cluster or later (see Creating the Compute Cluster or Managing Add-On Services).
- A network that will interconnect the Kubernetes master and worker nodes. It can be either a shared public network or a private network linked to a public one via a virtual router. The private network needs to have a gateway and a DNS server specified.
- An SSH key that will be installed on both the master and worker nodes.
- Enough resources for all of the Kubernetes nodes, taking their flavors into account.
Important
It is also required that the network where you create a Kubernetes cluster does not overlap with these default networks:
- 10.100.0.0/24—used for pod-level networking
- 10.254.0.0/16—used for allocating Kubernetes cluster IP addresses from
To create a Kubernetes cluster, on the Kubernetes clusters screen, click Create on the right. A window will open where you can set your cluster parameters:
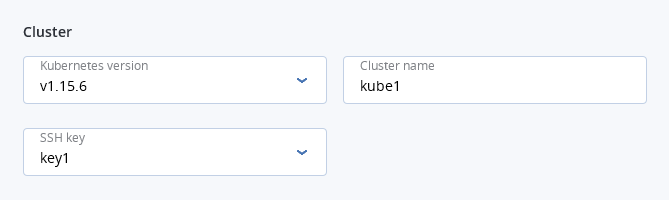
In the Cluster section, select a Kubernetes version, enter a cluster name, and select an SSH key.
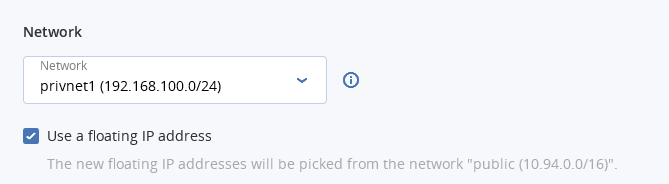
In the Network section, select a virtual router mentioned in the prerequisites above. It is also recommended to check the Use a floating IP address box. In this case, the Kubernetes nodes will be assigned public IP addresses, simplifying access to them.
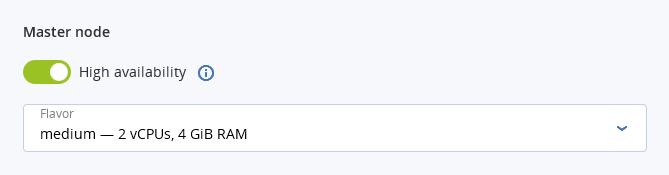
In the Master node section, select a flavor and choose whether or not to enable high availability for the master node. If you enable HA, three master node instances will be created. They will work in the Active/Active mode.
In the Container volume section, select a storage policy and enter size for volumes on both master and worker nodes.

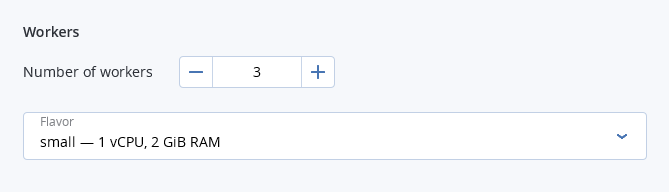
In the Workers section, set a number of workers to create and select a flavor for each worker.
Finally, click Create.
Creation of the Kubernetes cluster will start. The master and worker nodes will appear on the Virtual machines screen, while their volumes will show up on the Volumes screen.
After the cluster is ready, click Kubernetes access for instructions on how you can access the dashboard.
To delete a Kubernetes cluster, click it on the Kubernetes clusters screen and click Delete. The master and worker VMs will be deleted along with their volumes.
4.2.1. Using Persistent Volumes for Kubernetes Pods
Kubernetes allows using compute volumes as persistent storage for pods. Persistent volumes (PV) exist independently of pods, meaning that such a volume persists after the pod it is mounted to is deleted. This PV can be mounted to other pods for accessing data stored on it. You can provision PVs dynamically, without having to create them manually, or statically, using volumes that exist in the compute cluster.
4.2.1.1. Creating Storage Classes
In Acronis Cyber Infrastructure, storage classes map to compute storage policies defined in the admin panel. Creating a storage class is required for all storage operations in a Kubernetes cluster.
To create a storage class, click + CREATE on the Kubernetes dashboard and specify a YAML file that defines this object. For example:
apiVersion: storage.k8s.io/v1
kind: StorageClass
metadata:
  name: mysc
provisioner: csi-cinderplugin
parameters:
  type: default
This manifest describes the storage class mysc with the storage policy default. The storage policy must exist in the compute cluster and be specified in the storage quotas to the current project.
4.2.1.2. Dynamically Provisioning Persistent Volumes
Persistent volumes can be dynamically provisioned via persistent volume claims (PVC). A PVC requests for a PV of a specific storage class, access mode, and size. If a suitable PV exists in the cluster, it is bound to the claim. If suitable PVs do not exist but can be provisioned, a new volume is created and bound to the claim. Kubernetes uses a PVC to obtain the PV backing it and mounts it to the pod.
Important
A pod and the persistent volume claim it uses must exist in the same namespace.
You can dynamically provision a PV to a pod as follows:
Access the Kubernetes cluster via the dashboard. Click Kubernetes access for instructions.
On the Kubernetes dashboard, create a storage class as described in Creating Storage Classes.
Create a persistent volume claim. To do it, click + CREATE and specify the following YAML file:
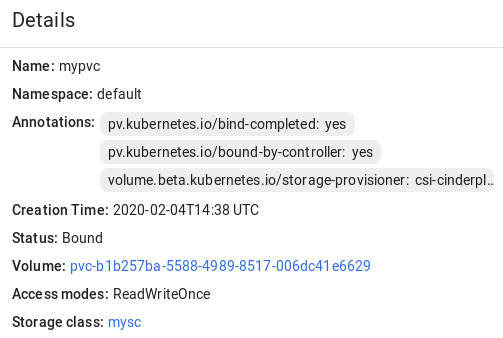
apiVersion: v1
kind: PersistentVolumeClaim
metadata:
  name: mypvc
spec:
  accessModes:
  - ReadWriteOnce
  resources:
    requests:
      storage: 10Gi
  storageClassName: mysc
This manifest specifies the persistent volume claim
mypvcthat requests from the storage classmysca volume of at least 10 GiB that can be mounted in the read/write mode by a single node.Creation of the PVC triggers dynamic provisioning of a persistent volume that satisfies the claim’s requirements. Kubernetes then binds it to the claim.
Create a pod and specify the PVC as its volume. To do it, click + CREATE and enter the following YAML file:
apiVersion: v1
kind: Pod
metadata:
  name: nginx
spec:
  containers:
  - image: nginx
    imagePullPolicy: IfNotPresent
    name: nginx
    ports:
    - containerPort: 80
      protocol: TCP
    volumeMounts:
      - mountPath: /var/lib/www/html
        name: mydisk
  volumes:
  - name: mydisk
    persistentVolumeClaim:
      claimName: mypvc
      readOnly: false
This configuration file describes the pod
nginxthat uses the persistent volume claimmypvc. The persistent volume bound to the claim will be accessible at/var/lib/www/htmlinside thenginxcontainer.
4.2.1.3. Statically Provisioning Persistent Volumes
You can mount existing compute volumes to pods using static provisioning of persistent volumes. To mount a compute volume, do the following:
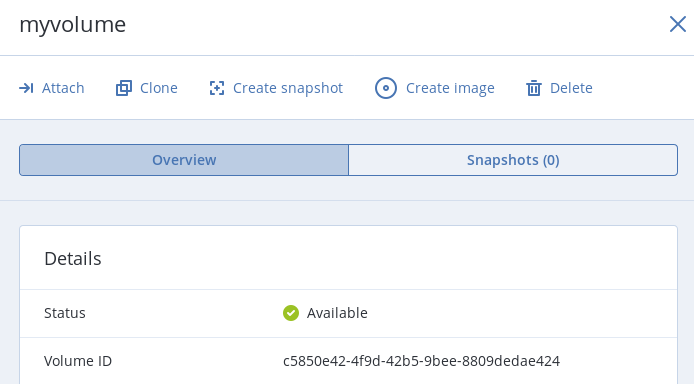
In the self-service panel, obtain the ID of the desired volume.
Access the Kubernetes cluster via the dashboard. Click Kubernetes access for instructions.
On the Kubernetes dashboard, create a storage class as described in Creating Storage Classes.
Create a persistent volume. To do it, click + CREATE and specify the following YAML file:
apiVersion: v1
kind: PersistentVolume
metadata:
  annotations:
    pv.kubernetes.io/provisioned-by: csi-cinderplugin
  name: mypv
spec:
  accessModes:
  - ReadWriteOnce
  capacity:
    storage: 10Gi
  csi:
    driver: cinder.csi.openstack.org
    fsType: ext4
    volumeHandle: c5850e42-4f9d-42b5-9bee-8809dedae424
  persistentVolumeReclaimPolicy: Delete
  storageClassName: mysc
This manifest specifies the persistent volume
mypvfrom the storage classmyscthat has 10 GiB of storage and access mode that allows it to be mounted in the read/write mode by a single node. The PVmypvuses the compute volume with the IDc5850e42-4f9d-42b5-9bee-8809dedae424as backing storage.Create a persistent volume claim. Before you define the PVC, make sure the PV is created and has the status “Available”. The existing PV must meet the claim’s requirements to storage size, access mode and storage class. Click + CREATE and specify the following YAML file:
apiVersion: v1
kind: PersistentVolumeClaim
metadata:
  name: mypvc
spec:
  accessModes:
  - ReadWriteOnce
  resources:
    requests:
      storage: 10Gi
  storageClassName: mysc
Once the persistent volume claim
mypvcis created, the volumemypvis bound to it.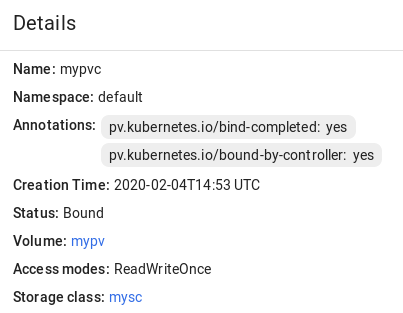
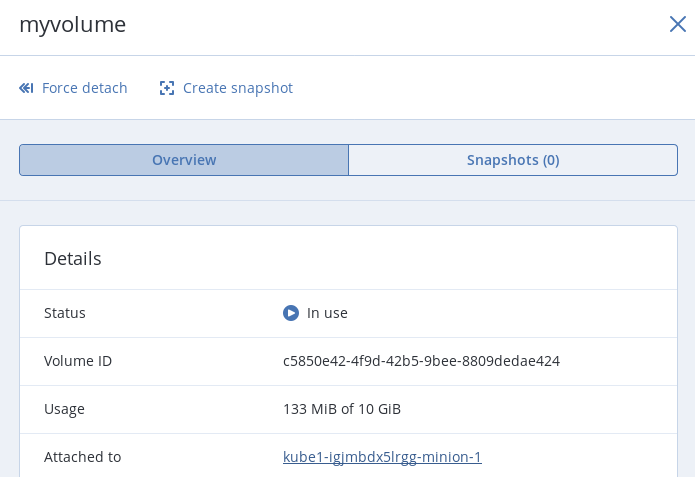
Create a pod and specify the PVC as its volume. Use the example from Step 3 in Dynamically Provisioning Persistent Volumes.
In the self-service panel, the compute volume will be mounted to the virtual machine running the Kubernetes pod.
4.2.2. Creating External Load Balancers in Kubernetes
In Kubernetes, you can create a service with an external load balancer that provides access to it from public networks. The load balancer will receive a publicly accessible IP address and route incoming requests to the correct port on the Kubernetes cluster nodes.
To create a service with an external load balancer, do the following:
Access the Kubernetes cluster via the dashboard. Click Kubernetes access for instructions.
On the Kubernetes dashboard, create a deployment and service of the
LoadBalancertype. To do it, click + CREATE and specify a YAML file that defines these objects. For example:If you have deployed the Kubernetes cluster in a shared public network, specify the following manifest:
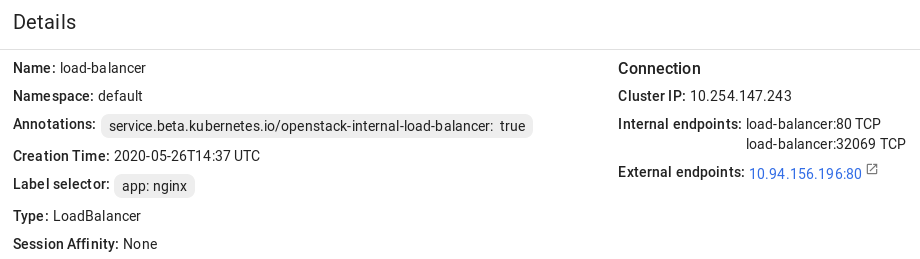
apiVersion: apps/v1beta1
kind: Deployment
metadata:
  name: nginx
spec:
  replicas: 2
  template:
    metadata:
      labels:
        app: nginx
    spec:
      containers:
      - name: nginx
        image: nginx
        ports:
        - containerPort: 80
---
kind: Service
apiVersion: v1
metadata:
  name: load-balancer
  annotations:
    service.beta.kubernetes.io/openstack-internal-load-balancer: "true"
spec:
  selector:
    app: nginx
  type: LoadBalancer
  ports:
  - port: 80
    targetPort: 80
    protocol: TCP
The manifest above describes the deployment
nginxwith a replica set of two pods and the serviceload-balancerwith theLoadBalancertype. The annotation used for the service indicates that the load balancer will be internal.Once the load balancer is created, it will be allocated an IP address from the shared public network and can be accessed at this external endpoint.
If you have deployed the Kubernetes cluster in a private network linked to a public one via a virtual router, you can use the YAML file above without the
annotationssection for theload-balancerservice. The created load balancer will receive a floating IP address from the public network and can be accessed at this external endpoint.
The load balancer will also appear in the self-service panel, where you can monitor its performance and health. For example:
