Changing network configuration
You can change your network configuration and IP address assignment to cluster nodes by using network migration.
Limitations
- DHCP can be enabled for the source network but must be disabled for the target network. After migration, IP addresses obtained via DHCP will become static.
Prerequisites
- All of the connected node interfaces are online.
- Each network interface has only one IP address.
- High availability is disabled, as described in Managing high availability configuration. You can enable high availability later, if required.
- If a network is the default gateway network, all nodes connected to it must use the same default gateway.
To migrate a network from the source configuration to the target one
- On the Infrastructure > Networks screen, click the cogwheel icon next to the network name.
- In the network summary window, click Migrate.
-
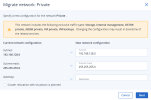
In the Migrate network: <network name> window, review the current network configuration, and important information about potential risks, and edit the new network configuration, if required.
If you plan to move your cluster to another location, which implies cluster manual shutdown, select Cluster relocation with shutdown is planned.
Then, click Next.
-
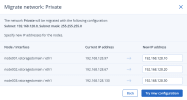
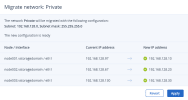
On the next step, specify new IP addresses for cluster nodes, and click Try new configuration. Then, confirm your action by clicking Continue in the Try new configuration window.
- If you plan cluster relocation, you can shut down your cluster nodes and then turn them on in a new datacenter, as described in Shutting down and starting up the cluster. After cluster relocation, click Resume.
-
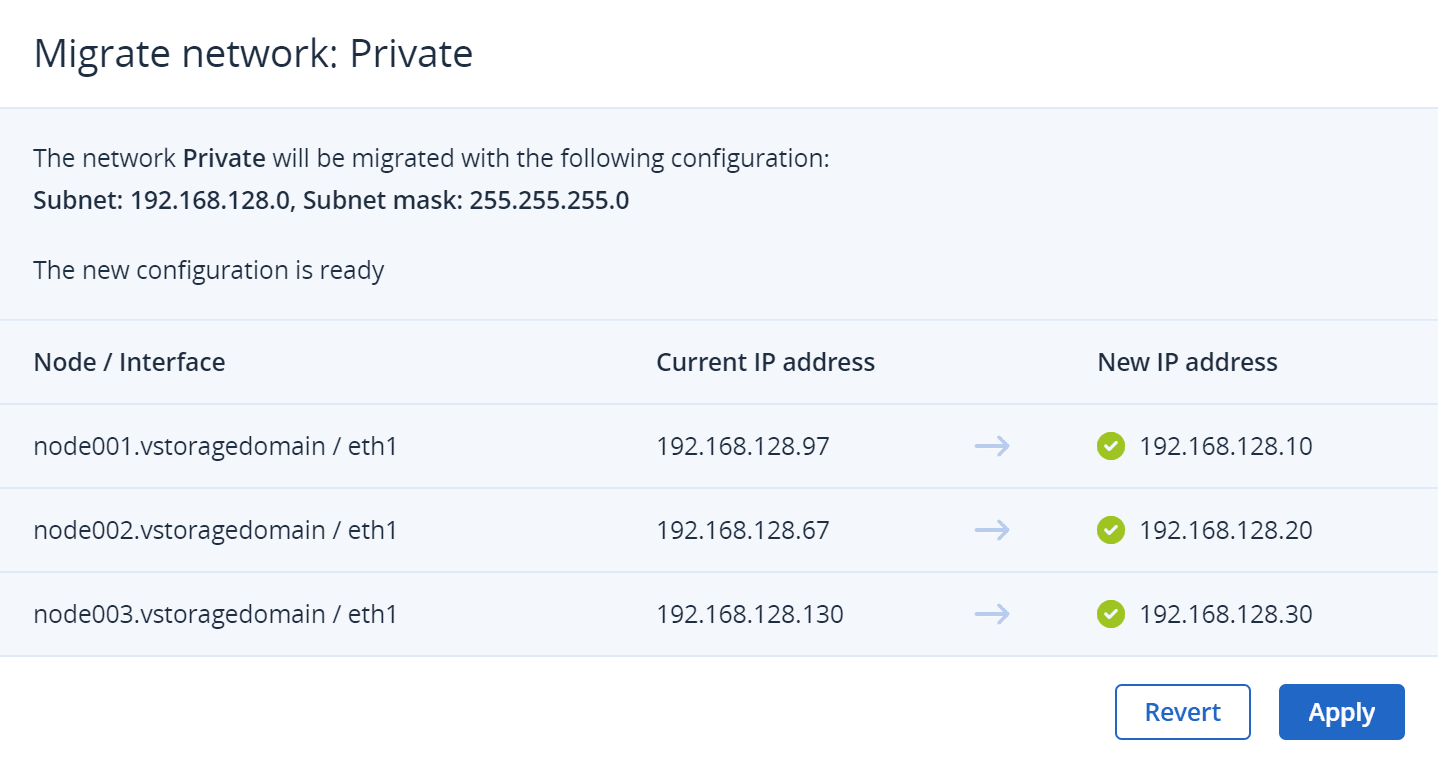
Wait until the new configuration is created and then click Apply.
While network migration is in progress, users cannot perform other tasks in the admin panel. Moreover, the self-service users may not have access to the portal and will need to wait until the migration is complete.
- If the connectivity checks fail, you need to fix the found issues and try again. If the specified new IP addresses are not available or valid, you can change them in the wizard and click Retry. With other network issues, revert to your old network configuration by clicking Revert, fix the issue, and try again.
- Wait until the migration is complete on all the connected interfaces, and then click Done.
- If you migrate a network with the Internal management traffic type, manually restart all running virtual machines, to be able to access them via VNC console.


To troubleshoot a failed migration
- Connect to your cluster via SSH.
- Investigate /var/log/vstorage-ui-backend/celery.log to find the root cause.
- Fix the issue.
- Go back to the wizard screen and click Retry.