Exporting Data via NFS
Acronis Storage allows you to organize nodes into a highly available NFS cluster in which you can create NFS shares. In Acronis Storage terms, an NFS share is an access point for a volume and as such it can be assigned an IP address or DNS name. The volume, in turn, can be assigned the usual properties: redundancy type, tier, and failure domain. In each share you can create multiple NFS exports which are actual exported directories for user data. Each export has, among other properties, a path that, combined with share’s IP address, uniquely identifies the export on the network and allows you to mount it using standard commands.
On the technical side, NFS volumes are based on object storage. Aside from offering high availability and scalability, object storage eliminates the limit on the amount of files and the size of data you can keep in the NFS cluster. Each share is perfect for keeping billions of files of any size. However, such scalability implies IO overhead that is wasted on file size changes and rewrites. For this reason, an NFS cluster makes a perfect cold and warm file storage but is not recommended for hot and high performance, often rewritten data (like running virtual machines). Integration of Acronis Storage with solutions from VMware, for example, is best done via iSCSI to achieve better performance.
Note
Acronis Storage only supports NFS version 4 and newer, including pNFS.
Setting Up an NFS Cluster
Since NFS is based on object storage, creating an NFS cluster is similar to creating an S3 one. Do the following:
Assign the internal Objest Storage private role and the public NFS role to a network interface on each node that will be in the NFS cluster. You can do so on the NODES > node > NETWORK screen.
On the SERVICES > NFS screen, select the desired available nodes to add to the NFS cluster.
Click Create NFS cluster.
Make sure that the network interface with the Objest Storage private role is selected in the drop-down list of each node. The corresponding interfaces with the public NFS roles will be selected automatically.
Note
If necessary, click the cogwheel icon and configure NFS roles on the Network Configuration screen.
Click CREATE.
After the NFS cluster has been created, you can proceed to creating NFS shares.
Creating NFS Exports
The process of creating NFS exports includes the following steps:
- Creating a root export that will contain user exports.
- Mounting the root export.
- Creating user exports in the mounted root export.
Creating the Root Export
To create a root NFS export, do the following:
On the SERVICES > NFS > SHARES screen, click the number in the Exports column in the row of the desired share. This will open the share screen.
On the share screen, click ADD EXPORT, specify
rootas the export name and/as path and select theread and writeaccess mode.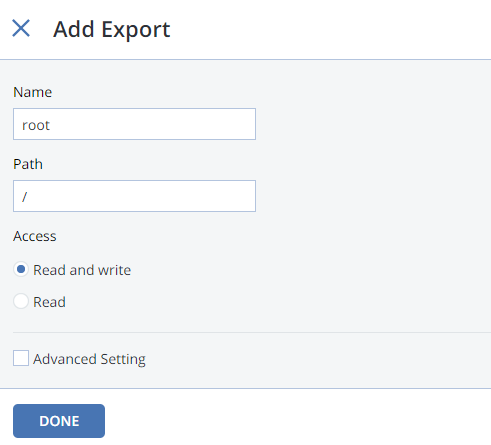
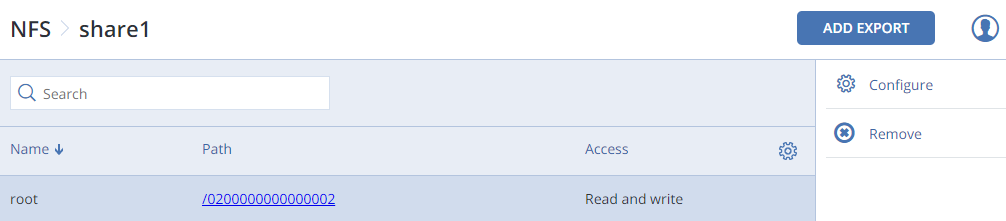
This will create a directory with a default path, e.g.,
/0200000000000002. The path designates export location inside the share and is used (alongside share’s IP address) to mount the export.Important
Do not give the users access to the root export.
The root export will be shown in the export list.
After creating the root export, mount it as described in the User’s Guide.
Warning
Do not mount NFS shares on cluster nodes. It may lead to node freeze.
Creating User Exports
After creating and mounting the root export, you can proceed to creating user NFS exports. To do this:
In the mounted root export, create a subdirectory for a user export, e.g.,
export1.On the share screen, click ADD EXPORT, enter a user export name, specify
/export1as path, and select the access mode.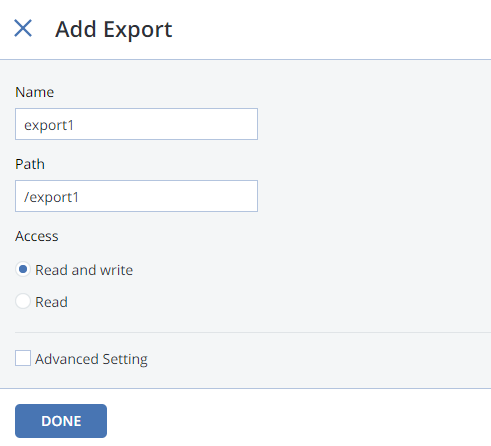
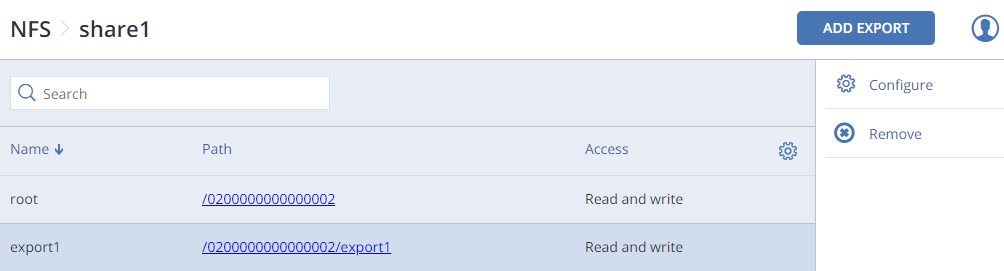
Click Done.
The user export will appear in the export list.
Setting Up User Authentication and Authorization
Acronis Storage allows you to authenticate users for access to specific NFS shares via Kerberos and authorize them to access specific NFS exports inside these shares via LDAP.
Authorizing NFS Export Users with LDAP
By configuring access to a user directory via LDAP, you can control which users can access which NFS exports. You will need a directory of user accounts with desired NFS access parameters.
To configure access to an LDAP server, do the following:
- On the SETTINGS > Security > LDAP tab, specify the following information:
- Address, the IP address of the LDAP server;
- Base DN, the distinguished name of the search starting point;
- Click Save.