Enabling management node high availability
To make your infrastructure more resilient and redundant, you can create a high availability (HA) configuration of three nodes. After it is created, you can expand it up to five nodes. With a five-node HA configuration, the cluster can tolerate a simultaneous failure of two management nodes.
Prerequisites
- A clear understanding of the concept High availability.
- A clear understanding of the limitations listed in High availability and the compute cluster.
- Each node to be added to the high availability configuration is connected to a network with the Admin panel and Internal management traffic types.
- The storage cluster is created by following the instructions in Deploying the storage cluster.
To create the high availability configuration
Admin panel
- Go to Settings > System settings > Management node high availability, and then click Create HA configuration.
- In the Create HA configuration window, select three nodes, and then click Next.
-
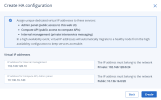
Depending on your network configuration, specify one or multiple unique static IP addresses for the highly available admin panel, compute API endpoint, and interservice messaging.
- Click Create.
Once the high availability of the management node is enabled, you can log in to the admin panel at the specified static IP address (on the same port 8888).
Command-line interface
Use the following command:
vinfra cluster ha create --virtual-ip <network:ip> --nodes <nodes> [--force]
--virtual-ip <network:ip>
HA configuration mapping in the format:
network: network to include in the HA configuration (must include at least one of these traffic types: Internal management, Admin panel, Self-service panel, or Compute API).ip: virtual IP address that will be used in the HA configuration.
Specify this option multiple times to create a HA configuration for multiple networks.
--nodes <nodes>
--force
For example, to create a management node HA cluster from nodes node001, node002, and node003, run:
# vinfra cluster ha create --virtual-ip Private:10.37.130.200 \
--virtual-ip Public:10.94.129.79 --nodes node001,node002,node003
The command specifies the network Private with the traffic type Internal management and the network Public with the traffic type Admin panel.
You can view the HA configuration in the vinfra cluster ha show output:
# vinfra cluster ha show
+-----------------------+---------------------------------------------------+
| Field                 | Value                                             |
+-----------------------+---------------------------------------------------+
| ha_cluster_location   | - https://10.94.129.79:8888                       |
| nodes                 | - id: 94d58604-6f30-4339-8578-adb7903b7277        |
|                       |   ipaddr: 10.37.130.118                           |
|                       |   is_primary: false                               |
|                       | - id: f59dabdb-bd1c-4944-8af2-26b8fe9ff8d4        |
|                       |   ipaddr: 10.37.130.134                           |
|                       |   is_primary: true                                |
|                       | - id: 4b83a87d-9adf-472c-91f0-782c47b2d5f1        |
|                       |   ipaddr: 10.37.130.127                           |
|                       |   is_primary: false                               |
| primary_node_location | https://10.94.62.243:8888                         |
| virtual_ips           | - ip: 10.37.130.200                               |
|                       |   roles_set: 5a0401b5-9b42-4d8b-8372-71c747230033 |
|                       | - ip: 10.94.129.79                                |
|                       |   roles_set: 5f0adc1d-c10f-46c1-b7b8-dd1aacab613b |
+-----------------------+---------------------------------------------------+
After the HA cluster is created, the admin panel will only be accessible at the provided public IP address. Log in to said address via SSH to continue managing Acronis Cyber Infrastructure with the vinfra CLI tool. You may also need to set the VINFRA_PASSWORD environment variable again, because you will access different HA cluster nodes on each login where it may not have been set.
