Deploying the Acronis Cyber Protect “All-in-One” Appliance virtual machine
Downloading the Acronis Cyber Protect “All-in-One” Appliance
-
Go to https://account.acronis.com/ and log in to your account. If you do not have one, you will need to create it—refer to https://kb.acronis.com/regacc.
-
Register your Acronis products, if not done before. For more information, see https://kb.acronis.com/productwebreg.
-
In the Products section, locate the Acronis Cyber Protect download links. For more information, refer to https://kb.acronis.com/latest.
-
Download AcronisCyberProtect_All-in-One_Appliance.zip.
-
Extract AcronisBackupAppliance.iso.
-
Add this image to the Acronis Cyber Infrastructure compute cluster as follows:
- On the Compute > Virtual machines > Images tab, click Add image.
- In the Add image window, click Browse, and then select the ISO file.
- Specify the image name and select the Generic Linux OS type. Click Add.
For more information, refer to "Uploading images for virtual machines" in the Administrator Guide.
Deploying the Acronis Cyber Protect “All-in-One” Appliance
The Acronis Cyber Protect “All-in-One” Appliance is a preconfigured virtual machine that you deploy in Acronis Cyber Infrastructure. For more information about the appliance, refer to Acronis Cyber Protect appliance.
-
On the Compute > Virtual machines > Virtual machines tab, click Create virtual machine. A window will open where you will need to specify the VM parameters.
-
Specify a name for the new VM.
-
In Deploy from, select Image.
-
In the Images window, select AcronisBackupAppliance.iso, and then click Done.
-
In the Volumes window, you do not need to add any volumes. The volume added automatically for the system disk is sufficient for Acronis Cyber Protect installation.
-
In the Flavor window, select the large flavor, and then click Done. This flavor will provide 4 vCPUs and 8 GB of RAM for the Acronis Cyber Protect virtual appliance.
-
In the network window, click Add, select a public virtual network interface, and then click Add. It will appear in the Network interfaces list. For more information on the interfaces, refer to "Creating virtual machines" in the Administrator Guide.
-
Back in the Create virtual machine window, click Deploy to create and boot the VM.

-
On the Compute > Virtual machines > Virtual machines tab, select the created virtual machine. Then, click Console and install the Acronis Cyber Protect OS by using the built-in VNC console.

-
On the initial installer screen, select Install or update Acronis Cyber Backup and press Enter.
The initial installer times out after 15 seconds, and the system will attempt to boot from the newly created virtual volume. If you see the message “Booting from local disk… No bootable device,” restart the virtual machine by clicking Send keys > Ctrl + Alt + Del
-
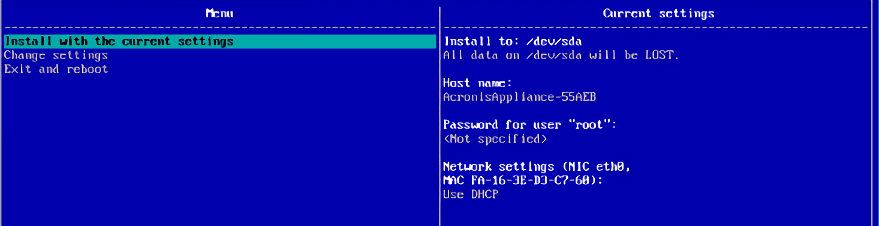
Change the installation settings: specify a host name (optional) and a password for the root user, and then configure network settings.
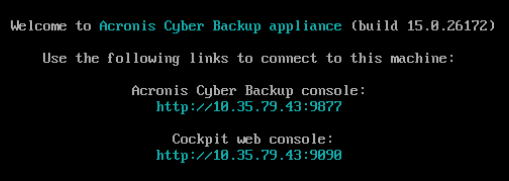
After the installation completes, the login screen details for the Acronis Cyber Protect console are displayed. Use the Acronis Cyber Protect console to configure and manage backup operations.
-
To install the full Acronis Cyber Protect license, refer to https://kb.acronis.com/content/65662.