5.1. Exporting storage space via iSCSI
Acronis Cyber Infrastructure allows you to export cluster disk space to external operating systems and third-party virtualization solutions, in the form of LUN block devices over iSCSI and in a SAN-like manner.
You can create groups of redundant targets running on different storage nodes. To each target group, you can attach multiple storage volumes with their own redundancy provided by the storage layer. Targets export these volumes as LUNs.
Each node in a target group can host a single target for that group. If one of the nodes in a target group fails along with its targets, healthy targets from the same group continue to provide access to the LUNs previously serviced by the failed targets.
5.1.1. Creating target groups
To create a target group, open Storage services > Block storage > Target groups and click Create target group. A wizard will open. Do the following:
- For Name and type, enter a target group name and select iSCSI. Next, select at least two nodes to add to the target group for high availability.
- For Targets, select iSCSI interfaces to add to the target group. For Volumes, select volumes to attach to target group LUNs, or you can add them later. For the evaluation scenario, skip the Access control settings.
- For Summary, review the target group details. Click Create.
The newly created target group will appear on the Target groups tab. Its targets will start automatically. Click the group name to view its details. On the Target tab, you can add more nodes for new targets. You can also view or add LUNs on the LUNS tab.
5.1.2. Creating volumes
- Open Storage services > Block storage > Volumes and click Create volume. A wizard will open.
- For Name and size, enter a volume name and specify its size. Note that volumes can be extended later, but not shrunk.
- For Storage policy, select a redundancy mode, a storage tier, and a failure domain.
- For Summary, review the volume details. Click Create.
5.1.3. Attaching volumes to target groups
- Open Storage services > Block storage > Target groups, click the ellipsis icon of the desired target group, and click Add LUNs.
- In the Attach window that opens, select volumes to attach to the target group or create them. Click Apply.
- On the Target groups tab, click the required target group name and go to the LUNS tab. Here, you can see all the available LUNs.
5.1.4. Accessing iSCSI targets from VMware vSphere
You can access iSCSI targets from Linux, Microsoft Hyper-V, and VMware vSphere. Refer to Accessing iSCSI targets for more details on access from Linux and Microsoft Hyper-V. The following section describes the VMware vSphere scenario for evaluation.
Before using Acronis Cyber Infrastructure volumes with VMware vSphere, you need to configure it properly to work with ALUA Active/Passive storage arrays. It is recommended that you change the default path policy to RR policy with the command:
# esxcli storage nmp satp set -s VMW_SATP_ALUA -P VMW_PSP_RR
Now you can reboot the host and create datastores from Acronis Cyber Infrastructure volumes exported via iSCSI. Log in to the VMware ESXi web panel and do the following:
In the Navigator, go to the Storage > Adapters tab and click Software iSCSI.
In the Configure iSCSI window, select Enabled. In the Dynamic targets section, click Add dynamic target and enter the IP addresses of your nodes.
Note
You can see the IP addresses in the admin panel. On the Infrastructure > Nodes screen, click the required node name. Then, go to the Network tab and copy the public network IP.
Click Save configuration.
Proceed to the Devices tab and click Refresh. The newly added disk will appear in the list of devices.
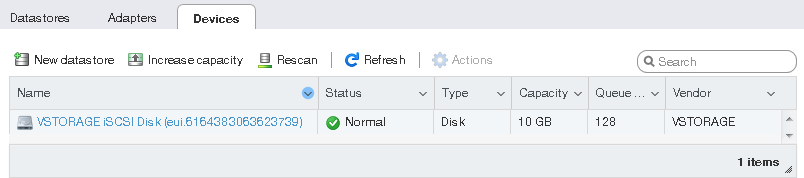
Select the disk and click New datastore. In the wizard that appears, enter a name for the datastore and select partitioning options. Click Finish to partition the disk.
Warning
Partitioning the disk will erase all data from it.
The ready-to-use disk will appear in the list of datastores. Select it and click Database browser to view its contents and upload files, so that you could proceed to check its accessibility.