3.4. Configuring the Appliance
Perform the following steps to configure the appliance:
Turn on the power: (a) press and hold down the main switch for five seconds, (b) press the power buttons of each node.
Connect an admin laptop (from which you will configure the appliance) to the network. Assign a static IP address to it from the same subnet that nodes are in, e.g., 10.20.20.100. As mentioned before, the nodes have preconfigured IP addresses: 10.20.20.11 to 10.20.20.15.
On this computer, open a web browser and visit the default primary node IP address 10.20.20.11. The wizard has been tested to work in the latest Firefox, Chrome, and Safari web browsers.
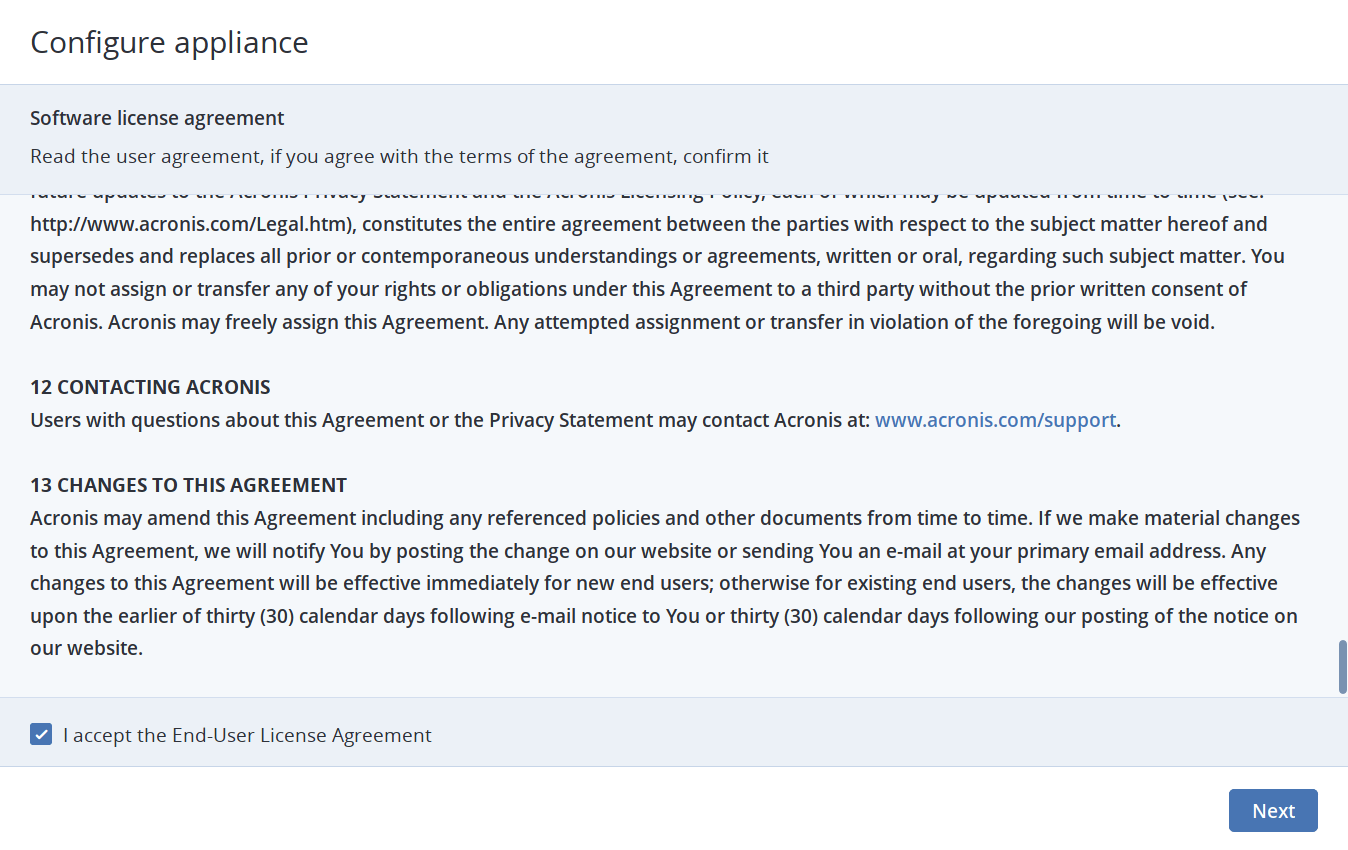
Once the configuration wizard is displayed, click Configure.
Review and accept the license agreement then click Next.
On the next step, enter the following:
- New host names for all nodes (or leave the default names). You can rename the nodes to fit your organization’s naming policies or make them relevant to your organization.
- New static IP addresses for network interfaces 1 on all nodes. If you leave the fields empty, the default addresses 10.20.20.11 to 10.20.20.15 will be used.
- Virtual IP address at which you will access the highly available admin panel. You can read more about high availability in the Administrator’s Guide.
- Network mask. Consult your network administrator for the proper network/subnet mask.
- At least one local DNS server.
- Gateway. Consult your network administrator for the proper gateway address.
- Domain name (optional). If this system will be visible from the Internet or if you wish to bind it to your organization’s domain, provide the domain prefix and suffix.
- Time zone and time. Since nodes communicate with each other, they must be on the same time zone and have the same time in order to ensure proper synchronization. Click Change time settings to set the correct time zone and time.
Important
Entered values cannot be changed later.
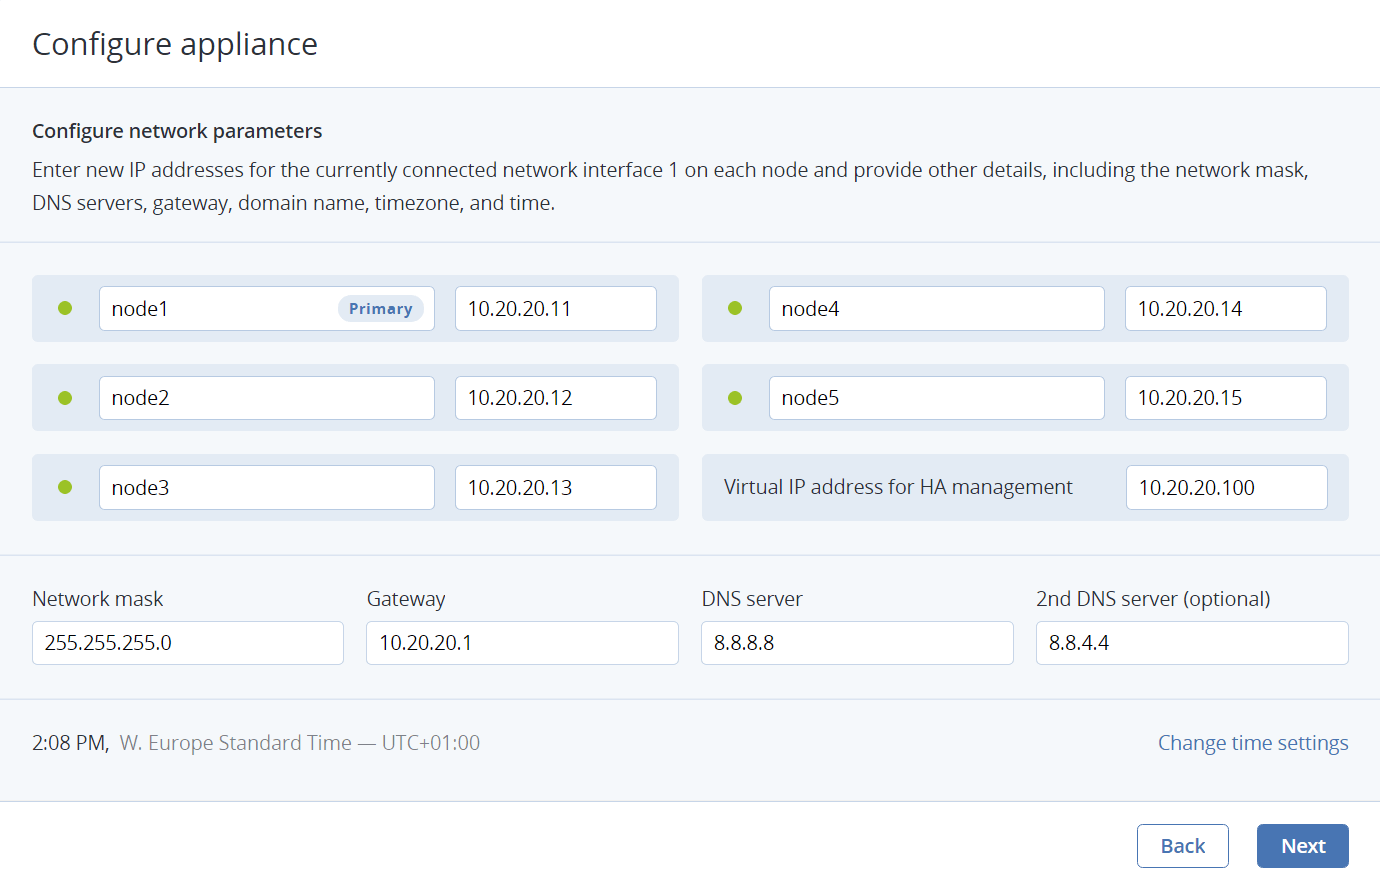
If one or more nodes are not reachable from the primary node, they will be marked as offline. In this case, make sure the nodes are powered on and connected to the correct network. Deployment will be blocked until all nodes are green (accessible and configurable by the primary node).
Note
You will be able to configure bonds and VLANs later in the admin panel.
Click Next.
On the next step, enter the cluster name (you cannot change it later) and cluster administrator password.
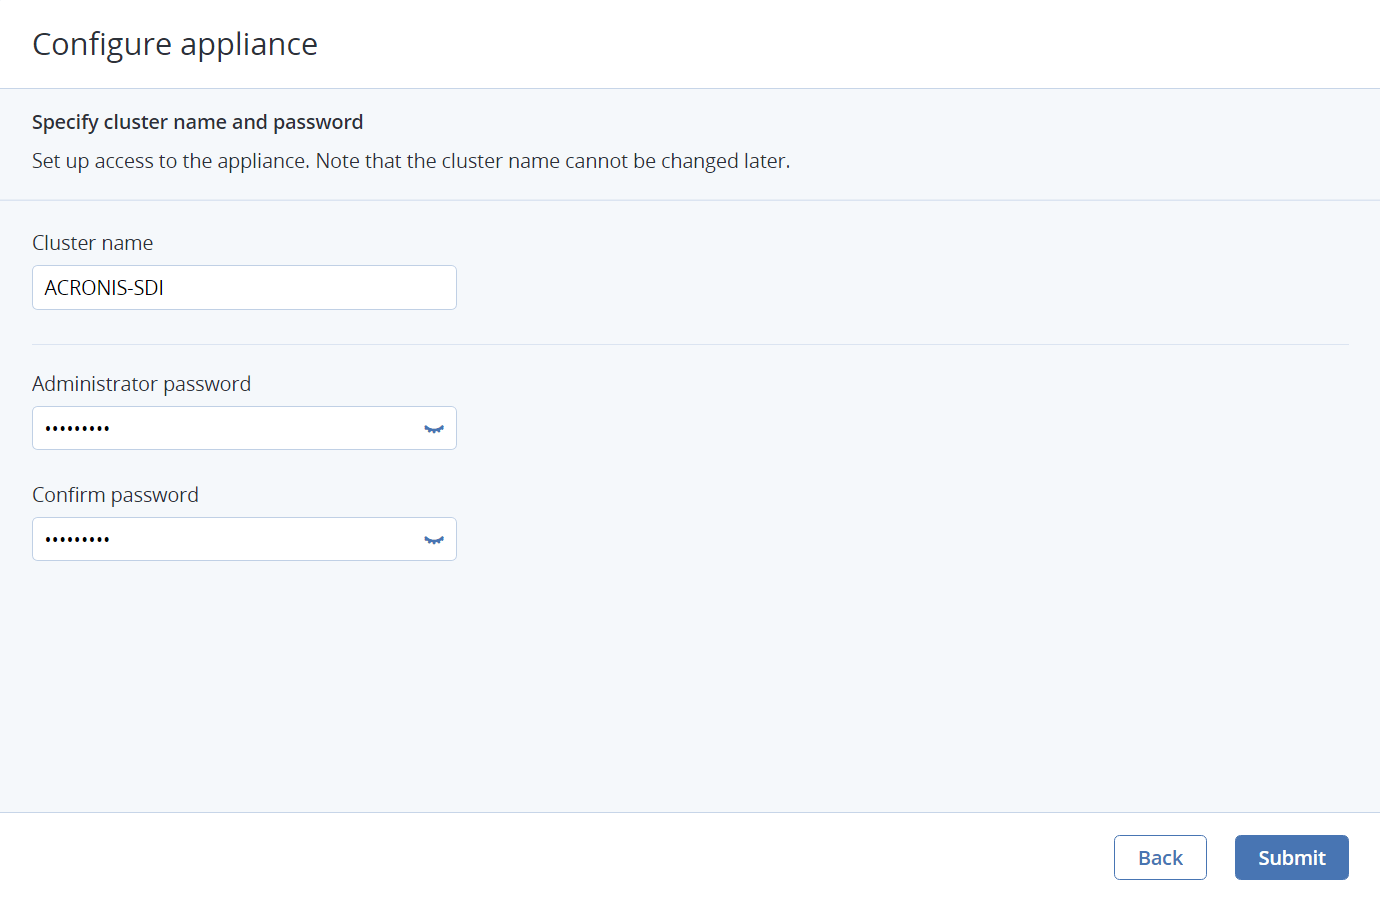
Click Submit. Configuration will begin, as indicated on the progress bar.
Wait until the progress bar reaches the end and change the IP address of the admin laptop to a free one from which you can access the appliance.
Once configuration is completed, you will see a link to the cluster admin panel. Log in with the username
adminand the specified password. The admin panel has been tested to work at resolutions 1280x720 and higher in the latest Firefox, Chrome, and Safari web browsers.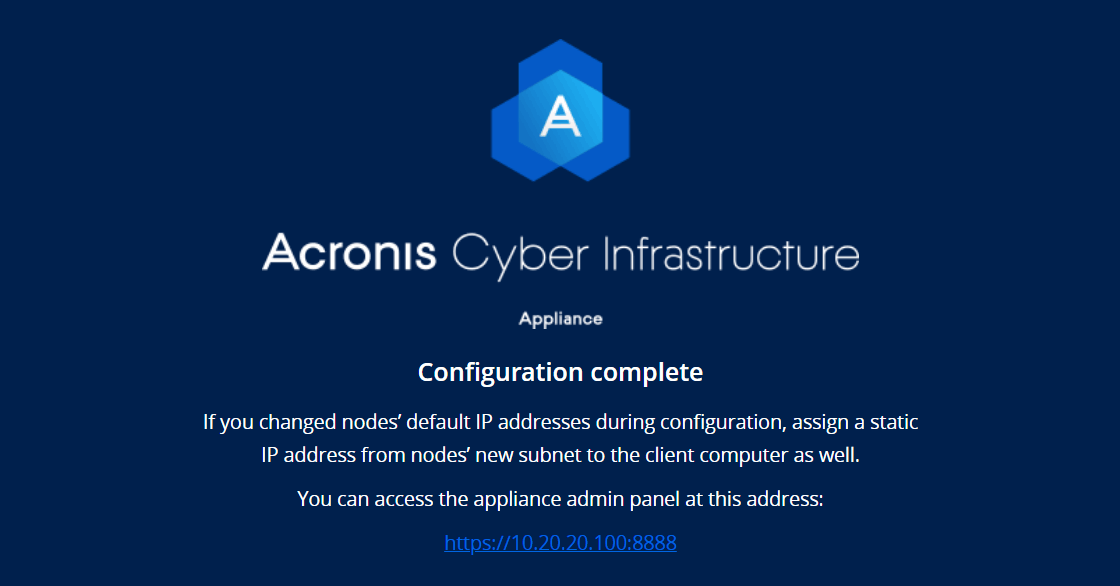
Proceed to SETTINGS > Licenses and upgrade the default trial license either by a key or SPLA (for more details, see Managing Licenses). If you do not have a license, contact your sales representative.
If you need to make additional changes to network configuration, e.g., create bonds and VLANs, connect cables to the network interface 2 and SFP slots and follow the instructions in the Acronis Cyber Infrastructure 3.0 Administrator’s Guide.
After deployment, update the product to the latest version (see Managing Updates). Finally, configure the cluster for the desired workload as described in the Acronis Cyber Infrastructure 3.0 Administrator’s Guide.